Salads
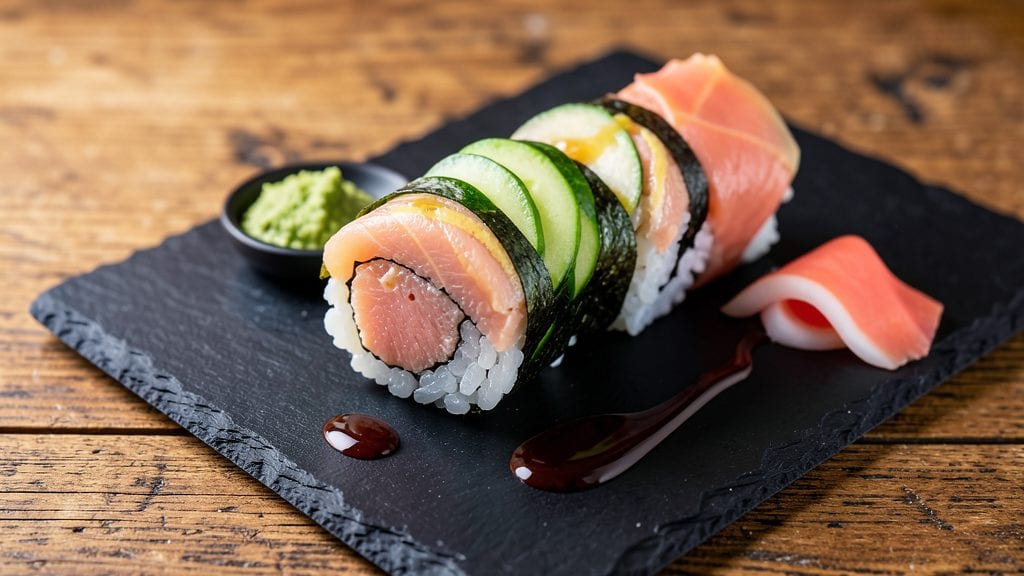
This canned tuna sushi roll recipe proves you don’t need expensive fish or hours of prep to make restaurant-quality rolls at home. The secret lies in perfectly seasoned rice and a crisp filling that balances the richness of tuna with fresh crunch.
I developed this version after realizing how often canned tuna gets overlooked in sushi—it’s just as versatile when prepared correctly.
The process is simpler than you’d expect, with 15 minutes of active prep and 30 minutes total time. You’ll start with sticky, vinegared rice that forms the perfect base, then layer it with canned tuna, cucumber, and avocado for that signature freshness.
The key technique is rolling tightly to prevent filling from spilling, a skill that comes with practice but yields impressive results.
What you’ll end up with is a crisp, satisfying roll that’s crunchy on the outside and tender inside—each bite delivers a perfect balance of flavors and textures. The nori adds a subtle oceanic aroma, while the tuna provides a rich, umami depth that stands up to the fresh vegetables.
This recipe is ideal for a quick lunch or light dinner, especially when you want something healthy yet indulgent.
Serve with soy sauce, wasabi, and pickled ginger for the full experience, or keep it simple with a drizzle of spicy mayo. The best part? These rolls hold together well when sliced, making them perfect for meal prep or sharing with guests.
Let’s get started on creating your own homemade sushi masterpiece.
Ingredients for canned tuna sushi roll
Quick pantry staples meet fresh crunch for these restaurant-style rolls—no fancy fish needed.
| Ingredient | Amount | Notes |
|---|---|---|
| Short-Grain Sushi Rice 🍚 | 1 ½ cups | Uncooked, Japanese short-grain preferred |
| Rice Vinegar 🍶 | ⅓ cup | Rice vinegar, not apple cider |
| Granulated Sugar 🍯 | 2 tbsp | Or substitute honey or maple syrup |
| Salt 🧂 | ¼ tsp | Fine sea salt preferred |
| Canned Tuna in Water 🐟 | 2 cans | High-quality, drained well |
| English Cucumber 🥒 | ½ whole | Seeded, thinly sliced lengthwise |
| Ripe Avocado 🥑 | ½ whole | Pitted, sliced into thin strips |
| Nori Sheets 🍣 | 4 sheets | High-quality, 7-inch size |
| Sesame Seeds 🌾 | 1 tbsp | White or black, toasted |
| Soy Sauce 🍶 | ¼ cup | For serving, low-sodium preferred |
| Wasabi 🌶️ | 1 tsp | Fresh or paste, for serving |
| Pickled Ginger 🍋 | ¼ cup | Thinly sliced, for serving |
| Spicy Mayo 🥛 | ¼ cup | Store-bought or homemade, for drizzling |
The rice is everything here. Koshihikari or Calrose are the gold standard for sushi rice, but any Japanese short-grain works in a pinch. Skip the pre-mixed seasonings—homemade rice vinegar mix (vinegar, sugar, salt) gives that perfect tangy sweetness. Trader Joe's sells great short-grain rice, but Asian markets have even fresher options. Pro tip: rinse the rice until the water runs clear—removes excess starch so it doesn’t get gummy. And use a rice cooker if you can—it nails the texture every time.
No nori sheets? Dried seaweed flakes can be pressed into thin sheets (not ideal but works). Avocado too ripe? Swap for thinly sliced bell pepper or shredded carrots for crunch. The tuna should be high-quality—Wild Planet or Starkist Select are my go-tos. Drain it well, then pat dry with paper towels to avoid soggy rolls. For extra flavor, mix the tuna with a pinch of soy sauce, a squeeze of lemon, and a dash of sesame oil before assembling. And if you’re feeling fancy, add a sprinkle of toasted sesame seeds to the filling for that authentic touch.
Assembled rolls keep 2-3 days in the fridge, wrapped tightly in plastic wrap. For meal prep, slice them into bite-sized pieces and store in an airtight container—perfect for quick lunches. Freezing isn’t recommended (nori gets mushy), but you can freeze the filling separately and roll fresh when ready. Serve with soy sauce, wasabi, and pickled ginger for the full experience, or keep it simple with spicy mayo. These rolls are best eaten fresh, but even day-old ones taste amazing—just reheat the filling slightly if the roll feels too firm.
Why You'll Love This Recipe
- Pantry Magic: The second you open that can of tuna, you’ve got dinner covered. No fresh fish to fillet, no last-minute grocery runs—just drain, mix, and roll. Honestly, I keep a few cans stocked just for this.
- Umami Bomb: That tuna in water? Surprisingly rich when paired with the bright, tangy rice vinegar and a pinch of sugar. The contrast of flaky tuna against the buttery rice is ridiculously satisfying—like a tiny, handheld flavor explosion.
- Lunchbox Hero: Wrap these in seaweed or serve them as bite-sized rolls for picnics, office lunches, or kids’ school snacks. They hold up perfectly for 2–3 days, so I double the batch and thank myself later.
- Budget Win: Short-grain rice and canned tuna are my wallet’s best friends. This recipe feeds four for under $10, and the leftovers? Even better cold the next day. (Yes, even on a Tuesday night.)
Step-by-step instructions for quick canned tuna sushi rolls
Here's the fastest way to make restaurant-quality sushi rolls at home—no fancy tools needed!
Cook the Short-Grain Sushi Rice to Perfect Texture
Rinse the 1.5 cups short-grain sushi rice in a fine-mesh strainer under cold water until the water runs clear. This removes excess starch and prevents gummy rice. Drain well, then transfer to a pot and add 2 cups water, 2 tablespoons granulated sugar, and ¼ teaspoon salt. Bring to a boil over high heat, then immediately reduce to low heat, cover tightly, and simmer for 15 minutes. Turn off the heat and let it steam for another 10 minutes—this resting time is crucial for fluffy, separate grains.
After resting, fluff the rice gently with a fork and transfer it to a shallow dish. Mix in the ⅓ cup rice vinegar evenly using a rice paddle or spatula. The vinegar adds that signature tangy flavor. Let the rice cool to room temperature while you prep the fillings—this prevents soggy rolls.
Prepare the Tuna-Avocado-Cucumber Filling
Open the 2 cans canned tuna in water and drain them thoroughly. In a medium bowl, gently mix the tuna with ¼ cup spicy mayo using a fork—just enough to combine without breaking up the texture. Add the ½ whole ripe avocado, pitted and sliced into thin strips, and the ½ whole English cucumber, seeded and thinly sliced lengthwise. Fold everything together lightly—you want the ingredients visible for that classic sushi look.
Sprinkle 1 tablespoon sesame seeds over the filling and toss gently. The seeds add crunch and visual appeal. Set this mixture aside while you prepare the nori sheets. Pro tip: If the avocado starts to brown, sprinkle a pinch of salt over it to slow oxidation.
Assemble the Sushi Rolls with Nori Sheets
Place a nori sheet shiny-side down on a bamboo sushi mat (or a clean kitchen towel if you don't have one). Wet your hands with water to prevent sticking, then spread ½ cup of the seasoned rice evenly over the nori, leaving about 1 inch bare at the top. The rice should be about ¼ inch thick—too thin and it won't hold together.
Spread the tuna-avocado-cucumber filling horizontally across the rice, about 1 inch from the bottom. Roll the mat tightly toward you, pressing gently but firmly. The filling will naturally tuck into the roll as you go. Seal the edge with a dab of rice to prevent unrolling. Repeat with the remaining 3 nori sheets and filling.
Slice and Serve with Classic Accompaniments
Using a sharp, wet knife, cut each roll into 6 equal pieces. Dip the knife in water between cuts to prevent sticking. Arrange the pieces on a platter and drizzle with a little more soy sauce for serving. This is where the magic happens—each bite delivers that perfect balance of creamy avocado, crunchy cucumber, and flaky tuna.
Serve immediately with pickled ginger and wasabi on the side. The ginger cleanses your palate between bites, while the wasabi adds a kick of heat. For extra flair, sprinkle with additional sesame seeds right before serving. These rolls are best enjoyed fresh, so don't wait—they're quicker to make than you think!
Pro Tips For Making Canned Tuna Sushi Roll
- Drain and pat the tuna: Drain the canned tuna thoroughly—don’t just shake it—then press it between paper towels to remove excess moisture. Wet tuna makes your roll soggy, and nobody wants a mushy center. (Yes, it’s tedious, but worth it.)
- Mix vinegar-sugar before adding rice: Whisk the rice vinegar, sugar, and salt into a smooth syrup first—this dissolves the sugar faster and gives the rice a more consistent tang. Pouring it over dry rice clumps just makes a sticky mess.
- Use a bamboo mat like a pro: Lay the mat on a damp towel to prevent sticking, then press firmly when shaping the roll—this seals the rice tight and keeps it from unraveling. Skip the towel, and you’ll spend more time scraping rice off your counter.
- Chill the tuna mix for 10 minutes: After mixing the tuna with seasonings (like soy sauce or sesame oil), let it sit in the fridge while you prep the rice. Cold tuna stays firmer in the roll and doesn’t turn to mush when sliced. (I learned this after one disastrous, oozy first attempt.)
Perfect pairings for this dish
Crispy Side Pairings
Balance the creamy tuna filling with crispy tempura vegetables like sweet potato or zucchini. Toss 1 cup thinly sliced sweet potato in ½ cup tempura batter (King Arthur brand works perfectly) and fry at 350°F for 2-3 minutes until golden.
The contrast of crispy outside and tender inside elevates every bite. 🌟
Zesty Dipping Sauces
Swap traditional soy sauce for spicy sriracha mayo—mix ¼ cup mayo with 1 tbsp sriracha and a pinch of garlic powder. This adds a kick that complements the tuna’s richness.
For a lighter option, try yuzu kosho sauce (Japanese citrus chili paste) available at specialty stores. Just 1 tsp per roll brings instant umami depth.
Fresh Salad Contrast
A cucumber-mango salad cuts through the richness beautifully. Toss 1 cup diced mango with ½ cup sliced cucumber, 1 tbsp rice vinegar, and ½ tsp sesame oil. The sweetness balances the tuna’s savory notes while keeping the meal light. Garnish with toasted sesame seeds for texture. 🥗
Warm Comfort Additions
Serve with miso-glazed edamame for a protein boost. Simmer 1 cup shelled edamame with 1 tbsp white miso paste and 1 tsp mirin for 5 minutes. The earthy miso pairs perfectly with the tuna’s oceanic flavors. Keep the edamame warm in a small pot on the table.
Beverage Pairings
Cool green tea (like Sencha or Jasmine varieties) cleanses your palate between bites. For something stronger, try a dry Riesling—its crisp acidity mirrors the rice vinegar’s tang.
Avoid heavy beers or sweet wines that overpower the delicate flavors. A sparkling water with lemon is my go-to for hydration without distraction. 🍶
Nutrition facts
Frequently asked questions
Can I use canned tuna in oil instead of water?
The recipe calls for tuna in water to keep the filling light and avoid excess fat. If you must use oil-packed tuna, drain it thoroughly and pat dry with paper towels. For every 1 can of oil-packed tuna, add 1 extra tablespoon spicy mayo to compensate for lost moisture. The texture will be slightly richer but still delicious.
How do I prevent my sushi rolls from falling apart?
Use a bamboo sushi mat for tight rolling—it's the secret to sturdy rolls. Keep the rice layer ¼ inch thick and the filling centered. Seal the edge with a dab of rice, and press gently but firmly as you roll. If your rolls still unravel, chill them in the fridge for 10 minutes before slicing to firm up the rice.
What if I don’t have a bamboo mat?
No problem! Use a clean kitchen towel or plastic wrap spread on a flat surface. Wet your hands and the towel slightly to prevent sticking. Roll as tightly as possible, using your hands to press the edges. The rolls won’t be as perfect, but they’ll still hold together well enough to slice.
Can I make these rolls ahead of time?
Assembled rolls keep for 2-3 days in the fridge, wrapped tightly in plastic. For meal prep, slice them into bite-sized pieces and store in an airtight container. Refrigerate the filling separately if you plan to roll fresh later—just avoid freezing, as it makes the nori mushy.
What’s the best way to slice sushi rolls?
Use a sharp, wet knife for clean cuts. Dip the blade in water between slices to prevent sticking. Cut each roll into 6 equal pieces with a gentle sawing motion. For extra flair, sprinkle with sesame seeds or drizzle with spicy mayo right before serving.