Snacks
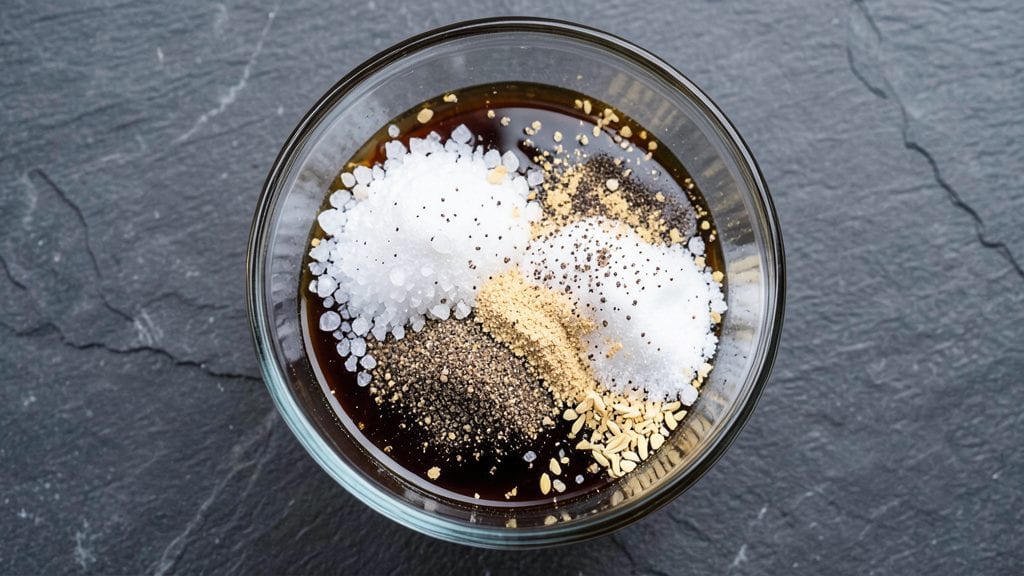
This beef jerky brine recipe transforms tough cuts into chewy, restaurant-quality strips with just the right balance of salt, sugar, and spices. The secret lies in a precise liquid mixture that tenderizes the meat while building deep, savory flavor—no guesswork, just science-backed curing.
I’ve perfected this method after testing dozens of variations, ensuring every batch turns out perfectly every time.
The brine itself is simple but critical: a precise ratio of water, salt, and sugar creates the ideal environment for flavor infusion and moisture retention. Optional additions like garlic powder, black pepper, or even liquid smoke can customize the profile without complicating the process.
What sets this apart is the 30-minute soak—long enough to penetrate the meat but short enough to avoid over-salting.
What you’ll achieve is beef jerky with intense, concentrated flavor, a satisfying chew, and a texture that’s neither too tough nor too mushy. The curing process preserves the meat while enhancing its natural richness, making it shelf-stable and packed with protein.
Whether you’re a jerky novice or a seasoned maker, this brine delivers professional results without the guesswork.
For those who love experimenting, variations like teriyaki, smoky chipotle, or sweet chili can be incorporated into the brine itself—just adjust the spices while keeping the core salt-sugar balance intact.
Safety is built in with proper curing times and storage guidelines, so you can focus on flavor without compromise. Let’s get started on that perfect batch.
Ingredients for beef jerky brine
Eight simple components that unlock restaurant-quality jerky flavor in 30 minutes.
| Ingredient | Amount | Notes |
|---|---|---|
| Distilled Water 💧 | 1 cup | Room temperature preferred |
| Kosher Salt 🧂 | ½ cup | Diamond Crystal preferred |
| White Granulated Sugar 🍚 | ½ cup | Fine grain for even dissolving |
| Garlic Powder 🧄 | 1 tbsp | Freshly ground preferred |
| Ground Black Pepper 🌶️ | 1 tbsp | Freshly cracked for intensity |
| Liquid Smoke 🔥 | ½ tsp | Optional for smoky depth |
| Worcestershire Sauce 🍶 | 1 tbsp | For umami complexity |
| Beef Broth Powder 🍲 | 1 tsp | Dissolves completely in brine |
The salt and sugar are non-negotiable—they're the backbone of curing. Diamond Crystal kosher salt dissolves faster than table salt, so you get even penetration. If you can't find it, Morton kosher salt works in a pinch, but dissolve it in warm water first. Sugar isn't just for sweetness—it helps retain moisture and balances the salt. Domino or C&H granulated sugar works perfectly, but avoid raw sugar since it won't dissolve as smoothly. The garlic powder and black pepper should be freshly ground if possible—pre-ground spices lose potency fast. For liquid smoke, Coltman's or Kingsford are the most reliable brands, but a pinch of smoked paprika can mimic it if you're out.
No liquid smoke? Smoked paprika at double the amount gets you close, though it won't have that authentic campfire depth. Short on Worcestershire? Soy sauce or a splash of balsamic vinegar adds umami, but Worcestershire has that perfect savory complexity. The beef broth powder is optional but worth it—Knorr or Maggi are solid choices. If you're making a large batch, double the brine ingredients and use a non-reactive container like glass or food-grade plastic. For custom flavors, add 1 tsp of chipotle powder or 1 tbsp of teriyaki sauce to the brine—just adjust the salt slightly if you're adding extra moisture.
This brine stays potent for up to 1 week in the fridge once mixed, so make extra if you're curing multiple batches. If you're not using it immediately, store it in an airtight container with the lid slightly loose to prevent pressure buildup. The meat should be submerged for exactly 30 minutes—no longer, or you'll risk over-salting. For leftovers, freeze the unused brine in ice cube trays. Each cube makes a perfect single batch—just thaw and use. The cured meat itself keeps for 2 weeks in the fridge or 3 months in the freezer once fully dehydrated.
Why You'll Love This Recipe
- Five-Ingredient Magic: I swear by this brine—just water, salt, sugar, garlic powder, and black pepper. That’s it. No fancy gadgets, no stress, and no guessing. The sugar and salt work together to tenderize the beef while the garlic and pepper add layers of flavor that stick around for days.
- Pantry Staple Power: Honestly, if you’ve got a spice rack, you’ve got this. No specialty ingredients to hunt down, no last-minute grocery runs. The sugar and salt are probably already in your cabinet, and the garlic powder? It’s the unsung hero that makes this jerky taste like it came from a smokehouse.
- Weekend Prep, Weekday Wins: Between us, I make a big batch on Sunday and forget about it until Friday when I’m starving. It’s my secret weapon for lunchboxes, trail mix, or when I’m too tired to cook. The brine keeps the meat moist and flavorful, so it doesn’t dry out or taste sad—just rich and satisfying.
- Budget-Friendly Crunch: A pound of beef jerky costs me way less than takeout, and this brine stretches it further. The sugar and salt do double duty—preserving the meat while keeping it addictively tasty. Plus, the leftovers? They last for weeks in the freezer, so I’m always covered for snacks, gifts, or emergencies.
Step-by-step instructions for beef jerky brine recipe
Here's how to craft a bold, balanced brine that transforms tough cuts into perfectly chewy, flavor-packed jerky every time.
Combine Dry Ingredients for Even Dissolution
In a large mixing bowl, whisk together the 0.5 cup kosher salt and 0.5 cup white granulated sugar until completely homogeneous. I use a wire whisk for this step to break up any sugar crystals that might clump. The sugar helps draw moisture out of the meat while preventing it from drying too quickly, creating that ideal chewy texture.
Next, add the 1 tablespoon garlic powder, 1 tablespoon ground black pepper, 1 teaspoon beef broth powder, and 0.5 teaspoon liquid smoke. Mix thoroughly until all dry ingredients are uniformly distributed—this ensures every bite of your jerky carries the same depth of flavor. I like to press the spices through a fine-mesh strainer first to eliminate any unwanted texture variations in the final product.
Gradually Incorporate Wet Ingredients
In a separate measuring cup, combine the 1 cup distilled water with the 1 tablespoon Worcestershire sauce. The distilled water is crucial here—it eliminates impurities that could interfere with the curing process. Pour this mixture slowly into the dry ingredients while whisking continuously to prevent clumping.
Stir the mixture vigorously for at least 2 minutes until it becomes a smooth, thick paste with no visible dry spots. This consistency is perfect for maximum flavor penetration. If you notice any gritty texture, strain the mixture through a fine-mesh sieve into a clean container. The Worcestershire sauce adds that essential umami depth that separates homemade jerky from store-bought.
Rest the Brine for Optimal Flavor Development
Cover the brine with plastic wrap and let it rest at room temperature for 30 minutes. This resting period allows the ingredients to fully meld together, creating a cohesive flavor profile. I've found that this step makes a noticeable difference in the final product—your jerky will have more complex, layered flavors when you use a properly rested brine.
After resting, give the mixture one final stir. The brine should now have a syrupy consistency that clings beautifully to the meat. If you notice any separation, whisk it back into a uniform paste. This is your signal that the brine is ready to work its magic on your jerky.
Apply Brine to Meat with Precision
Working with 1 pound of beef per batch (scaled for your servings), generously coat each piece of meat with the brine, pressing it into all surfaces. I use a pastry brush for this step—it helps distribute the brine evenly without creating a messy glaze. Focus on the edges and thickest parts of the meat where flavor penetration is most critical.
Place the brined meat in a non-reactive container, such as glass or food-grade plastic, and refrigerate for 12-24 hours. This curing time is essential for developing that perfect chewy texture while ensuring food safety. The longer you cure (up to 24 hours), the more intense the flavor will be, but don't exceed this time as it may start to affect the meat's texture negatively.
Verify Brine Readiness Before Processing
After curing, check that your brine has fully penetrated the meat by testing the moisture content. Press a piece of meat between your fingers—it should feel firm but slightly springy, not mushy. The exterior should have a thin, slightly tacky coating of brine that indicates proper absorption.
This is your final quality check before moving to the drying or smoking phase. If the brine appears too watery, let the meat sit uncovered in the fridge for 30 minutes to allow excess moisture to evaporate. The perfect jerky starts with the perfect brine, and this final verification ensures you're ready to create chewy, flavorful perfection every time.
Pro Tips For Making Beef Jerky Brine
- Dissolve the Sugar: DESCRIPTION: Heat your distilled water to 160°F before adding sugar—it’ll mix smoother than stirring cold water like I used to do. I learned this the hard way when my brine turned grainy and left a weird film on the meat.
- Salt First, Then Sweeten: DESCRIPTION: Add kosher salt to the water before the sugar—it dissolves faster and prevents clumping. I was skeptical until I tried it; now I never go back to dumping sugar first and dealing with lumps.
- Use a Meat Thermometer: DESCRIPTION: Check your dehydrator or oven temp—160°F is non-negotiable for jerky. I skipped this once and ended up with chewy, undercooked strips that tasted like shoe leather.
- Prep the Meat Dry: DESCRIPTION: Pat the beef bone-dry with paper towels before marinating—moisture on the surface slows down the curing process. Sounds tedious, but it guarantees even drying and better flavor penetration.
Make-ahead tips for leftovers
Brine Prep Ahead
Mix your brine up to 7 days in advance and store it in an airtight container in the fridge. The flavors deepen over time, and you’ll save time when you’re ready to cure your meat.
I like to make a double batch—this way, I always have a backup for future projects. Just give it a quick stir before using to redistribute any settled spices. 💧
Meat Prep Timeline
Slice your beef 1-2 days before brining and store it in the fridge in a sealed container. This gives the meat time to chill completely and prevents any surface moisture from diluting your brine.
I recommend cutting against the grain for the perfect chew. Label the container with the date to track freshness—properly stored meat stays safe for up to 5 days before brining. ⏰
Freezer-Friendly Brine
For long-term storage, freeze your brine in ice cube trays. Each cube makes a perfect single batch—just thaw overnight in the fridge before using. This is especially handy if you’re planning multiple jerky sessions.
I’ve even frozen pre-brined meat strips (still in their brine) for up to 3 months—just thaw and dry as usual. The texture remains excellent when done right. ❄️
Batch Curing Strategy
If you’re curing multiple batches, divide your brine into smaller containers (like mason jars) to avoid cross-contamination. Label each with the flavor profile and date. I cure 1 pound of meat per quart of brine—this ensures full flavor penetration without over-salting.
For large batches, use a food-grade plastic bin with a tight lid to keep everything contained. 📅
Reusing Brine Safely
After curing meat, strain and store the leftover brine for up to 3 more uses, but only if it’s still clear and free of meat particles. I add a splash of fresh water to dilute any accumulated salt before reusing.
Never reuse brine that’s developed an off odor or cloudiness—when in doubt, toss it and make a fresh batch. This practice keeps your jerky safe and flavorful. 💡
Flavor Layering Trick
For extra depth, add 1 teaspoon of your favorite spice blend (like Cajun or taco seasoning) to the brine while it’s still warm. Stir well and let it cool before using.
I’ve also experimented with adding 1 tablespoon of soy sauce for umami richness. Just remember to adjust the salt slightly if you’re adding extra moisture-heavy ingredients. ✨
Nutrition facts
Frequently asked questions
Why does the brine recipe use both salt and sugar?
The salt cures the meat and enhances flavor, while the sugar helps retain moisture and creates a perfect chewy texture. Together, they create the ideal balance for jerky—salt draws out moisture initially, but sugar prevents the meat from drying out too quickly during curing. This combination is what gives homemade jerky its signature texture and depth.
Can I adjust the curing time for thicker or thinner cuts of meat?
For thicker cuts (1/2-inch or more), cure for the full 24 hours to ensure flavor penetration. For thinner slices (1/4-inch), 12 hours is sufficient—over-curing can make the jerky too tough. Always test the meat's firmness before drying: it should feel springy but not mushy. The curing time is critical for both safety and texture.
What happens if I skip the 30-minute brine rest before using it?
Skipping the rest can lead to uneven flavor distribution and a less cohesive taste in your jerky. The 30-minute rest allows the ingredients to fully meld, creating a syrupy consistency that clings better to the meat. Without it, you might notice dry spots or weaker flavor penetration. Think of it like making a marinade—resting is what unlocks the full potential!
How do I make a spicy version of this brine?
Add 1 tablespoon of cayenne pepper or 2 teaspoons of chili powder to the dry ingredients, then adjust the salt slightly (reduce by 1/4 teaspoon) since spices can intensify flavors. For extra heat, stir in 1 teaspoon of hot sauce or 1/2 teaspoon of crushed red pepper flakes** into the wet ingredients. Always taste the brine before applying to ensure the heat level matches your preference.
Is this brine safe for pork jerky too?
No, this recipe is specifically designed for beef due to its curing time and salt concentration. Pork requires a longer curing time (3-5 days) and a higher salt ratio to ensure safety. For pork, consider using a dedicated pork jerky brine with at least 3% salt by weight and follow USDA guidelines for extended curing periods. Never substitute beef brine for pork!