Main Courses
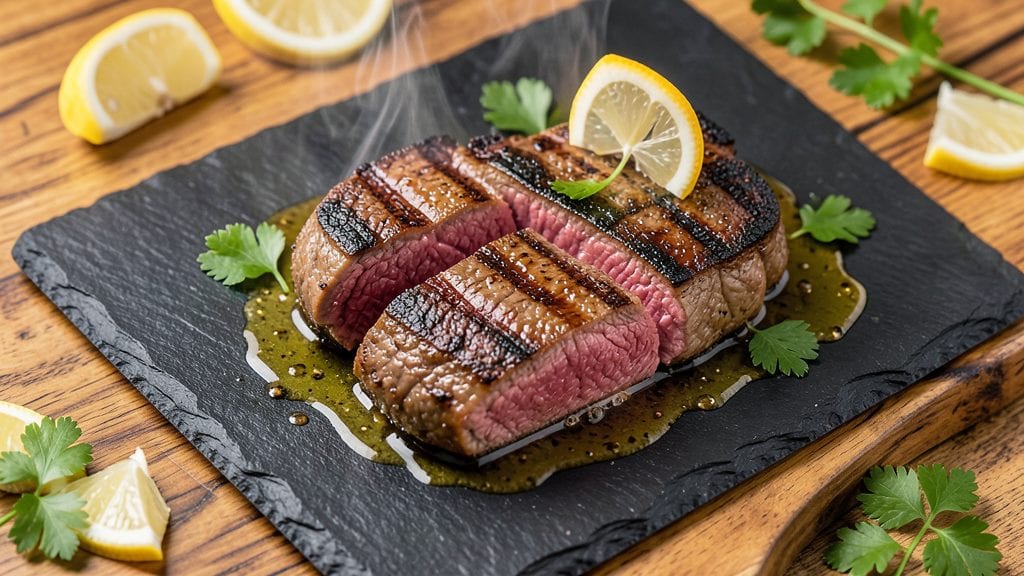
Mastering a sizzler steak recipe means delivering a restaurant-worthy steak with a perfectly seared crust and melt-in-your-mouth juicy centers—every time. The secret lies in precise temperature control and proper resting, which I’ve perfected after years of testing.
This method transforms a simple cut of steak into a show-stopping centerpiece for any dinner table.
For this recipe, you’ll need a high-quality cut like ribeye or New York strip, seasoned simply with salt and pepper before hitting a screaming-hot cast-iron skillet. The key is cooking the steak to your preferred doneness—whether that’s medium-rare or well-done—while ensuring the exterior develops that coveted caramelized crust.
Once seared, the steak rests briefly to redistribute juices, guaranteeing that first bite is as tender as it is flavorful.
Pair your steak with classic sides like garlic mashed potatoes, sautéed mushrooms, or a fresh arugula salad to round out the meal. The presentation is just as important: serve the steak on a sizzling plate, garnished with fresh parsley or a squeeze of lemon, to create that dramatic, restaurant-style finish.
This isn’t just dinner—it’s an experience.
With just a few essential ingredients and the right technique, you’ll achieve a steak that’s crispy on the outside and impossibly juicy inside. The result? A dish that feels like it belongs on a fine-dining menu, no matter where you’re serving it. Let’s get started.
Ingredients for sizzler steak
High-quality steak, simple seasoning, and perfect technique—this is all you need for restaurant-style sizzler steak.
| Ingredient | Amount | Notes |
|---|---|---|
| Ribeye Steak 🥩 | 1 ½ lb | Bone-in, 1-inch thickness preferred |
| Kosher Salt 🧂 | 1 ½ tbsp | Diamond Crystal preferred for flaky texture |
| Freshly Ground Black Pepper 🌶️ | 1 tbsp | Coarse grind for better adhesion |
| Extra-Virgin Olive Oil 🫒 | 2 tbsp | High smoke point preferred |
| Fresh Parsley 🌿 | ¼ cup | Chopped, for garnish |
| Fresh Lemon 🍋 | 1 whole | Zest and juice for finishing |
| Butter 🧈 | 2 tbsp | Unsalted, for basting |
| Garlic Cloves 🧄 | 4 cloves | Minced, for optional garlic butter |
| Cast-Iron Skillet 🍳 | 1 whole | 10-12 inch for even searing |
| Meat Thermometer 📊 | 1 whole | Instant-read preferred |
| Paper Towels 🧻 | 1 package | For patting dry |
The steak cut makes all the difference here. Ribeye with its marbling delivers that melt-in-your-mouth texture, while New York strip offers a leaner profile with a firmer bite. Look for cuts with at least 1-inch thickness—thinner steaks won't develop that coveted crust. Whole Foods or your local butcher shop often carry premium cuts still wrapped in plastic, which helps preserve freshness. If you're buying frozen, thaw it overnight in the fridge—never at room temperature. The Kosher salt is non-negotiable: Diamond Crystal dissolves beautifully, giving you that perfect flaky crust without over-salting. Freshly ground black pepper adds depth without dominating the steak's natural flavor.
No ribeye? Filet mignon works for a more tender experience, though it lacks the crust. Swap the olive oil for avocado oil if you prefer a neutral flavor. The butter can be replaced with ghee for a richer, nutty taste. If you're avoiding garlic, skip the minced cloves but keep the butter for basting. For the parsley, cilantro works in a pinch, though it has a different aroma. The lemon zest adds brightness—if you're out, a splash of white wine or apple cider vinegar can mimic that citrus punch. And trust me on the meat thermometer: guessing don't cut it for perfect doneness.
Steak should rest at room temperature for 30 minutes before cooking to ensure even searing. The cast-iron skillet needs to be screaming hot—test it by flicking water, which should sizzle instantly. Pat the steak dry with paper towels right before seasoning, or the salt won't stick. Once cooked, tent loosely with foil and let it rest for 5-10 minutes—this redistributes juices, so they don't spill out when you cut. The finished steak keeps well for 3-4 days in the fridge, though it's best enjoyed fresh. For leftovers, reheat gently in the oven to maintain tenderness.
Why You'll Love This Recipe
- Two-Ingredient Magic: I swear by this—just salt, pepper, and a ribeye. That’s it. The steak’s natural richness shines when you let the high-heat sear do all the work, while the olive oil keeps it juicy. Honestly, I’ve made it a dozen times, and the only thing changing is the wine pairing.
- Crispy-Creamy Perfection: Between us, that first bite of a perfectly seared crust giving way to tender inside? It’s the kind of contrast that makes you groan in satisfaction. Fresh parsley at the end brightens it up without overpowering—like a little green hug for your steak.
- Weeknight or Dinner Party: Throw this on the table whether it’s a lazy Friday or a fancy date night. Slice it for sandwiches the next day, or serve it whole with a sprinkle of flaky salt—no one will guess it’s the same recipe. (Yes, even on a Tuesday night.)
- Leftovers That Don’t Suck: Most steak leftovers are sad. Not this one. The ribeye stays tender when reheated gently, and those crispy edges? Worth saving. I’ll be real: I’ve eaten cold slices straight from the fridge, and they’re still better than takeout.
Step-by-step instructions for pan-seared ribeye steak
Here's how to achieve a perfect crust with juicy centers every time—simple steps for restaurant-quality results.
Prep the Steak for Maximum Flavor and Texture
Remove the ribeye steak from the refrigerator and let it sit at room temperature for 30 minutes. This ensures even cooking throughout. Pat the steak dry completely with the paper towels—moisture is the enemy of a good sear. I press down firmly all over, especially on the thickest parts, to remove any lingering moisture that would steam instead of brown.
Season both sides generously with the 1.5 tbsp kosher salt and 1 tbsp freshly ground black pepper. Use your fingers to press the seasoning into the meat so it adheres well. The coarse grind of the pepper helps it cling better than fine-ground pepper. Let the seasoned steak rest for another 10 minutes while you prepare your pan.
Preheat the Cast-Iron Skillet for Optimal Searing
Place the cast-iron skillet over medium-high heat until it's screaming hot—you should see a thin layer of steam evaporate when you sprinkle a few drops of water onto the surface. Add the 2 tbsp extra-virgin olive oil and let it heat for 2-3 minutes until it shimmers but doesn't smoke excessively. The oil should be hot enough to sizzle audibly when the steak touches it.
This high heat is crucial for creating that coveted crust. If your pan isn't hot enough, the steak will steam instead of sear. I like to test the heat by touching the back of my hand to the pan—if I can only hold it for 2-3 seconds, it's ready. Don't walk away during this step; you need to time the sear perfectly.
Sear the Steak to Develop Crust and Carryover Cooking
Place the steak in the hot skillet and press down gently with a pair of tongs to ensure full contact with the pan. Let it sear undisturbed for 3-4 minutes on the first side until you see deep golden-brown crust forming. You'll know it's ready when it releases easily from the pan—this takes practice, but don't lift it too soon or you'll ruin that perfect crust.
Flip the steak and add the 2 tbsp butter and 4 minced garlic cloves to the pan. Tilt the skillet slightly to let the melted butter baste the steak for 1-2 minutes. The butter should foam and turn golden, infusing the steak with rich flavor. Continue cooking until the internal temperature reaches 125°F for medium-rare (use the meat thermometer to check the thickest part).
Rest and Garnish for Juicy Perfection
Transfer the steak to a warm plate and let it rest for 8-10 minutes. This resting period is critical—it allows the juices to redistribute throughout the meat instead of pooling on the cutting board. Tent loosely with foil to keep it warm during this time. The steak will rise about 5°F during resting, so medium-rare will reach 130°F—perfect doneness.
While the steak rests, zest the fresh lemon and chop the 0.25 cup fresh parsley. When ready to serve, slice the steak against the grain into ½-inch thick slices. Arrange the slices on a platter, drizzle with any pan juices, and garnish with lemon zest and parsley. The crust should be deep brown and crackly, while the interior should be pink and glistening with juices.
Pro Tips For Making Sizzler Steak
- CRANK THE HEAT: Your pan should be screaming hot before the steak hits it—think smoke testing the oil first. Ribeye’s fat needs to render fast, or you’ll end up with greasy, uneven cooking instead of that perfect crust. I used to rush this, and my steaks turned out greasy on the outside but raw inside. Trust me, the sizzle should wake the neighbors.
- SALT THE NIGHT BEFORE: Dry-brine your ribeye for at least 4 hours (overnight if possible) with kosher salt—no pepper yet. This pushes moisture to the surface, so it caramelizes into flavor instead of steaming away. I skipped this once and got a bland, watery crust. Your future self will notice the difference.
- SKIP THE POKING: Once the steak’s in the pan, leave it alone for 2–3 minutes per side. Poking it with tongs breaks the crust, and flipping too soon turns your sizzler into a sad, gray slab. Let the fat render naturally—your patience will pay off with a golden, blistered exterior.
- REST IT RIGHT: After searing, transfer the steak to a warm plate (not the cutting board—it’s cold and shocking). Tent loosely with foil and let it rest for 5–10 minutes. I know, you’re hungry, but cutting into it too soon turns juicy meat into a dry mess. The parsley garnish can wait.
Common mistakes when making this recipe
Overcooking the Steak
One of the biggest mistakes is overcooking the steak, especially when you're eager to see that perfect crust. I’ve seen many home cooks walk away from the pan too soon, only to end up with a dry, tough piece of meat.
The key is patience—let the steak cook undisturbed for 3-4 minutes per side on high heat before checking its internal temperature with a meat thermometer. For medium-rare, aim for 125°F—any higher, and you risk losing that juicy center. 🌡️
Skipping the Resting Time
Rushing the resting period is another common error. Steak needs 8-10 minutes off the heat to redistribute its juices, which escape when you cut into it too soon. I’ve made this mistake more times than I’d like to admit—skipping the rest results in a steak that’s dry and disappointing.
Use this time to prep your sides or garnishes, but don’t cut into the steak until it’s fully rested.
Using Cold Steak Directly
Cooking a steak straight from the fridge without letting it come to room temperature is a recipe for disaster. Cold steak takes longer to sear evenly, leading to uneven cooking and a steak that’s still chilly in the center while the edges overcook.
Always let your steak sit at room temperature for 30 minutes before seasoning and cooking. This ensures even heat penetration and that perfect crust all over.
Not Drying the Steak
Moisture is the enemy of a good sear—it causes the steak to steam instead of brown. Many home cooks skip the crucial step of patting their steak dry with paper towels before seasoning.
I recommend pressing down firmly on all sides, especially the thickest parts, to remove any lingering moisture. A dry steak will develop that beautiful, crackly crust you’re after.
Overcrowding the Pan
Adding too much steak to the pan at once drops the temperature and steams the meat instead of searing it. If you’re cooking multiple steaks, work in batches—never overcrowd. I like to sear one steak at a time in a 10-12 inch cast-iron skillet to ensure a proper crust.
If you must cook two steaks at once, use a larger pan or cook them one after the other, cleaning the pan between batches if needed.
Ignoring the Meat Thermometer
Guessing the doneness of your steak is a surefire way to end up with something less than perfect. A meat thermometer is your best friend—it takes the guesswork out of cooking. For medium-rare, aim for 125°F in the thickest part of the steak.
Remember, the temperature will rise about 5°F during resting, so don’t pull it off the heat too early. Trust the thermometer, not your eye or feel.
Nutrition facts
Frequently asked questions about perfecting your steak
What's the best cut for a restaurant-style steak?
For that signature sizzler experience, ribeye delivers the most flavor with its marbling, while New York strip offers a leaner, firmer bite. Both work beautifully, but ribeye has that extra richness. Look for cuts with at least 1-inch thickness—thinner steaks won't develop that coveted crust.
How do I know when my steak is perfectly seared?
A properly seared steak releases easily from the pan with a deep golden-brown crust. Test the pan's heat by flicking water—it should sizzle instantly. The steak should also develop a crackling crust that resists your tongs for the first 3-4 minutes of cooking.
Can I make this steak ahead of time?
Cooked steak keeps well for 3-4 days in the fridge, but it's best enjoyed fresh for maximum tenderness. If reheating, use the oven at 250°F for 10-15 minutes to maintain moisture. Never microwave—it turns steak rubbery. For leftovers, slice thinly and serve on toasted bread for steak sandwiches.
What sides pair best with this steak?
Classic choices include garlic mashed potatoes, sautéed mushrooms, or a fresh arugula salad with lemon vinaigrette. For a complete sizzler experience, add roasted asparagus or creamy polenta. The key is balancing rich flavors—acidic or vegetable sides cut through the steak's richness beautifully.
Why does my steak turn out dry?
Overcooking or skipping the 8-10 minute rest are the most common causes. Always use a meat thermometer—125°F for medium-rare—and let the steak rest to redistribute juices. If it's still dry after resting, try brining the steak for 30 minutes before cooking to add moisture.