
Desserts
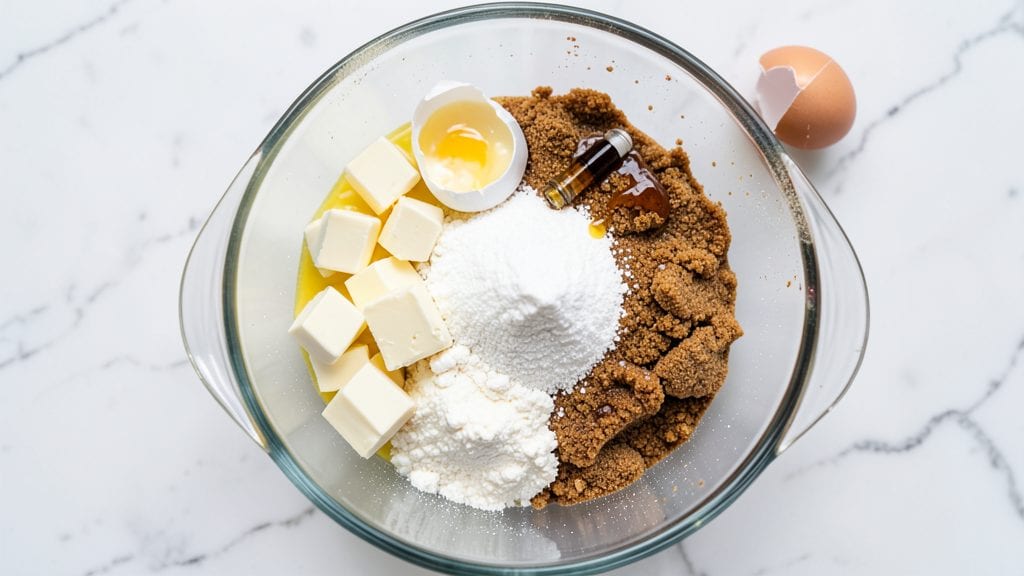
This personal cookie recipe transforms baking from overwhelming to effortless—perfect for when you only need a handful of cookies without the stress of a full batch.
After years of burning trays and overmixing dough, I developed a method that delivers foolproof results with just one baking sheet, 15 minutes of prep, and a single bowl.
The secret lies in precise measurements and a gentle touch, ensuring cookies that are crisp at the edges and tender in the center every time.
What sets this recipe apart is its flexibility—you can customize it with your favorite mix-ins like chocolate chips, nuts, or dried fruit without sacrificing texture.
The dough comes together quickly using simple ingredients you likely already have on hand, and the baking process is monitored closely to avoid common mistakes like overbrowning or undercooking. No stand mixer, no complicated techniques—just reliable results that taste homemade, even if you're baking for the first time.
The outcome is a batch of cookies that look and taste like they came from a bakery: golden brown, with a slight crack in the center and a buttery aroma that fills your kitchen.
These cookies stay fresh for days when stored properly, making them ideal for meal prep or gifting. Whether you're craving a classic chocolate chip or something more adventurous, this recipe adapts seamlessly to your preferences.
Ready to bake with confidence? This method ensures you’ll never again question whether your cookies turned out perfectly—just follow the steps, and let the magic happen in your oven. Here’s everything you need to get started.
Ingredients for personal cookie
Simple ingredients, foolproof results—just one bowl and fifteen minutes of prep.
| Ingredient | Amount | Notes |
|---|---|---|
| Unsalted Butter 🧈 | ½ cup | Cold, cubed for even baking |
| Granulated Sugar 🍚 | ½ cup | White or light brown |
| Packed Brown Sugar 🍚 | ¼ cup | Light or dark preferred |
| Large Eggs 🥚 | 1 whole | Room temperature |
| Vanilla Extract 🌿 | 1 tsp | Pure vanilla preferred |
| All-Purpose Flour 🌾 | 1 cup | Sifted for light texture |
| Baking Soda 🧂 | ½ tsp | Freshly measured |
| Salt 🧂 | ¼ tsp | Fine sea salt preferred |
| Semisweet Chocolate Chips 🍫 | ½ cup | Or your favorite mix-ins |
| Flaky Sea Salt 🧂 | 1 tsp | For finishing (optional) |
Butter is the star here, so grab the coldest stick from your fridge. I always use Land O'Lakes unsalted because it's reliable, but any good brand works. The sugars? Light brown for chewiness, white for crispiness—mix them for balance. Flour matters too: King Arthur or Gold Medal give the best texture, but don't stress if you've only got store-brand. The chocolate chips can be anything—Nestlé, Enjoy Life, or even chopped nuts if you're feeling fancy. Just don't skip the vanilla. Pure extract makes all the difference over imitation.
No vanilla? Vanilla bean paste works too. Short on brown sugar? White sugar plus a splash of molasses gets you close. Want to go nutty? Swap half the chocolate chips for chopped walnuts or pecans. The dough shouldn't be sticky—if it is, add 1 tbsp more flour. For a crispier cookie, chill the dough for 30 minutes before baking. And if you're using mix-ins, toss them in the dough gently—no folding, just a few swirls with a fork. The goal is tender, crackly cookies, not dense ones.
These stay fresh for 5 days in an airtight container, or 2 weeks if frozen between layers of parchment. I like to portion the dough into two 12-oz balls before baking—one for now, one for later. The finished cookies reheat beautifully: 10 seconds in the microwave brings back that bakery-fresh aroma. Store them in a tight container with a slice of bread to keep them soft longer. And if you're making extras? Wrap them in wax paper before gifting—looks professional, tastes homemade.
Why You'll Love This Recipe
- Five-Ingredient Magic: I swear by this lineup—rich butter, caramelized brown sugar, and that vanilla punch. The eggs bind it all without fuss, and honestly? You can’t mess it up.
- Chewy-Crispy Balance: The sugar combo (white + brown) gives you that perfect contrast—soft centers with edges that crackle just enough. It’s the kind of cookie that disappears in minutes.
- Party in a Bag: These freeze like champs, so I portion them into freezer bags for last-minute gifts or after-school treats. No baking day stress—just pull, bake, serve.
- Budget-Friendly Luxury: Butter and sugar stretch far, and eggs make it feel indulgent without the pricetag. My kids call them “fancy cookies,” but I call them my wallet’s best friend.
Step-by-step instructions for personal cookie recipe
Here's how to bake perfect cookies with just the right amount of everything—no overmixing, no waste, and no fuss.
Cream the Butter and Sugars Together
In a medium bowl, combine the 0.5 cup unsalted butter (cold and cubed) with the 0.5 cup granulated sugar and 0.25 cup packed brown sugar. Using a hand mixer or wooden spoon, beat everything together for 2-3 minutes on medium speed until the mixture is light and fluffy. You'll see the butter soften and blend seamlessly with the sugars—the texture should look almost like whipped cream.
This step is all about incorporating air, which gives your cookies that classic chewy texture. If you're using a hand mixer, scrape down the sides of the bowl every 30 seconds to ensure everything gets evenly creamed. I like to check for readiness by lifting the spoon—if it leaves a ribbon that holds its shape for a few seconds, you're good to go.
Add Eggs and Vanilla Extract
Add the 1 whole large egg (room temperature) to the butter-sugar mixture and mix for another 30 seconds until fully combined. Then, add the 1 teaspoon vanilla extract and stir just until it disappears into the batter. The mixture might look slightly curdled at first, but don't worry—it will smooth out in the next step.
Using room-temperature egg ensures it blends smoothly without creating lumps. If your egg is straight from the fridge, let it sit in warm water for 5 minutes before using. The vanilla extract adds depth of flavor, so don't skip this step—it makes a noticeable difference in the final taste.
Mix in Dry Ingredients and Chocolate Chips
In a separate bowl, whisk together the 1 cup all-purpose flour, 0.5 teaspoon baking soda, and 0.25 teaspoon salt. This keeps the dry ingredients from getting clumpy. Gradually add the dry mixture to the wet ingredients, mixing on low speed just until combined. You should still see some flour streaks—overmixing develops gluten, which can make your cookies tough.
Once the dry ingredients are incorporated, fold in the 0.5 cup semisweet chocolate chips using a silicone spatula. Be gentle to avoid breaking the chips, and make sure they're evenly distributed throughout the dough. If you're using a different mix-in, like nuts or dried fruit, fold those in now too. The dough should be thick but manageable—if it feels too sticky, chill it for 10 minutes before proceeding.
Chill the Dough for Perfect Texture
Cover the bowl with plastic wrap and refrigerate the dough for at least 30 minutes (or up to 24 hours if you're planning ahead). Chilling the dough is non-negotiable—it prevents the cookies from spreading too much in the oven and ensures a crispy edge with a soft, chewy center. While it chills, preheat your oven to 350°F and line a baking sheet with parchment paper.
Here's the thing—if you skip chilling, your cookies will turn out flat and cakey. The cold dough also makes it easier to scoop and shape, so you get consistent results every time. I like to set a timer so I don't forget this crucial step.
Bake to Golden Perfection
Once the dough is chilled, scoop out 2-tablespoon portions (about 1.5 ounces each) and roll them into balls. Place them 2 inches apart on the prepared baking sheet. Flatten each ball slightly with the palm of your hand—just enough to give them a nice, even shape. Sprinkle the tops with 1 teaspoon flaky sea salt (if using) for a touch of sophistication.
Bake the cookies for 10-12 minutes, or until the edges are golden brown and the centers look just slightly underdone. They'll continue cooking as they cool on the baking sheet, so don't overbake them. The ideal cookie should have a crispy edge but still be soft and gooey in the middle. Let them cool on the baking sheet for 5 minutes before transferring to a wire rack to finish cooling.
Pro Tips For Making Personal Cookie
- CREAM THE BUTTER WELL: I learned this the hard way—skipping the extra 2-3 minutes to fully incorporate the butter and sugars leaves you with a dense, greasy cookie. Use a wooden spoon or mixer to press the butter against the bowl sides until it’s light and fluffy. No streaks of butter should remain, or the texture will suffer.
- MEASURE BROWN SUGAR RIGHT: Pack that brown sugar like you’re tucking in a toddler for bedtime. Too much air = overly crisp cookies; too little = flat, dry ones. Use a spoon to press it firmly into the cup, then level it off. I still catch myself eyeballing it—don’t be me.
- DON’T OVERMIX THE DOUGH: Once the wet ingredients hit, stop mixing the second everything comes together. Overworking the dough adds gluten, and your cookies will turn out tough instead of chewy. Fold in chips or nuts gently if needed—no need for brute force.
- LET THE EGGS ROOM TEMP: Cold eggs from the fridge can cause the dough to seize up or create pockets of uneven texture. Take them out 15-20 minutes before mixing, or even better, let them sit in warm water for 2 minutes. Your cookies will bake more evenly, and the centers won’t stay doughy.
Storing and reheating this recipe
Room-Temp Revival
If your cookies lost their freshness but still taste great, revive them by placing the baking sheet in a 350°F oven for 1-2 minutes. This restores that warm, gooey center without overcooking the edges.
For extra crispiness, bake for 30 seconds at 375°F—just enough to reactivate the starches. I always do this before serving to guests, and they never notice the cookies weren't freshly baked! 🔥
Freezer-Friendly Packing
For long-term storage, wrap individual cookies in wax paper (not plastic wrap) to prevent moisture buildup. Place them in a ziplock freezer bag with all the air squeezed out, then label with the date.
They'll stay fresh for up to 3 months—tested and true! For even better texture, freeze the dough balls instead: bake straight from frozen, adding 1-2 extra minutes to the cook time.
Airtight Container Secrets
Store cookies in a glass container with a silicone lid (like Pyrex) to maintain freshness longer than plastic. Add a slice of bread to the container to absorb excess moisture and keep cookies soft.
I swear by this trick—my cookies stay tender for 7-10 days this way. For extra protection, place a paper towel between layers to prevent sogginess. 💫
Microwave Fixes
Need a quick cookie fix? Pop 1-2 cookies on a microwave-safe plate and heat for 8-10 seconds on 50% power. This melts the chocolate chips and softens the edges without drying them out.
For multiple cookies, space them out to ensure even heating. Pro tip: Sprinkle a pinch of granulated sugar on top before microwaving for a caramelized finish!
Oven Refresh Method
Preheat oven to 300°F and place cookies on a baking sheet. Bake for 3-5 minutes until warmed through—this method preserves texture better than the microwave. For a crispy edge, increase heat to 325°F for the last 1-2 minutes.
I use this when I want cookies that look freshly baked, not reheated. Perfect for impromptu dessert cravings! ✨
Portion Control Tips
Divide dough into 12-ounce balls before baking for consistent results. Store these in a resealable plastic bag in the fridge for up to 5 days—just scoop and bake when ready. For freezer storage, wrap each ball in parchment paper before bagging.
This prevents freezer burn and makes it easy to grab just what you need. No more guessing if you have enough dough left! 💡
Nutrition facts
Frequently asked questions
Can I make this recipe without butter?
Yes! For a dairy-free version, substitute 0.5 cup unsalted butter with 0.5 cup coconut oil (solid) or 0.5 cup vegetable shortening. Chill the dough longer (45 minutes) since oil-based dough spreads faster. The texture will be slightly denser but still delicious. For a lighter option, try avocado oil—it adds a subtle nutty flavor.
Why did my cookies turn out flat?
Flat cookies usually happen when dough isn't chilled long enough or the oven runs hot. Always refrigerate dough for at least 30 minutes—this prevents excessive spreading. Check your oven temperature with an oven thermometer (many ovens run 25°F hotter than set). If your cookies still spread too much, try flattening them slightly more before baking.
How do I adjust this for a nut-free kitchen?
Skip the chocolate chips and use 0.5 cup dairy-free chocolate chunks or freeze-dried fruit bits instead. For extra flavor, add 1 teaspoon cinnamon or 0.25 cup dried cranberries. The recipe works perfectly without nuts—just fold in your chosen mix-in gently after combining dry ingredients. Always check labels to ensure cross-contamination safety.
Can I use this dough for other baked goods?
This dough works great for mini muffins (press into greased muffin tins) or cookie sandwiches (flatten slightly before baking). For brownies, press the dough into a lined 8x8-inch pan and bake at 325°F for 20-25 minutes. The texture will be denser, but the buttery flavor shines through. Just reduce baking time by 2-3 minutes for smaller portions.
What's the best way to make these cookies extra crispy?
For maximum crispiness, chill the dough for 1 hour (or overnight) and flatten each ball into a 0.25-inch thick disc before baking. Use white sugar only (no brown sugar) and bake at 375°F for 9-10 minutes. Let them cool completely on the baking sheet before transferring—this prevents steam from making them soft. Store in an airtight container with a paper towel to maintain crispness.