Desserts
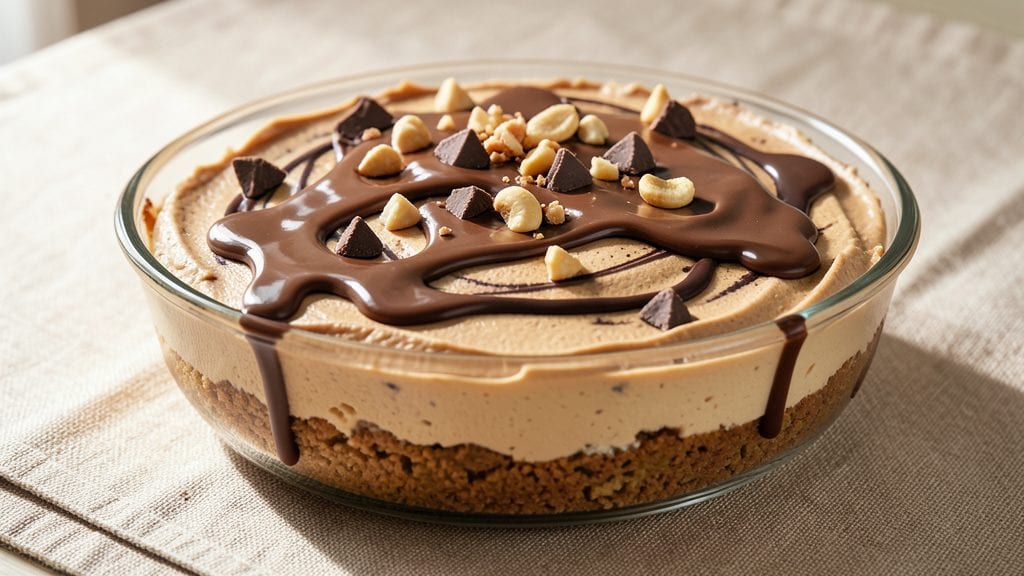
This no-bake Reese's peanut butter cheesecake delivers restaurant-quality fudgy swirls with just five simple ingredients and no oven required. ✨ The secret lies in precise mixing ratios and proper chilling times, ensuring a creamy, velvety texture that rivals baked versions.
I developed this recipe after years of testing no-bake desserts, and it consistently delivers that perfect balance of peanut butter richness and smooth cheesecake filling.
The foundation starts with a buttery, crumbly crust that holds together without cracking, followed by a luscious peanut butter filling that swirls beautifully through the cream cheese base.
What makes this recipe truly special is how the flavors meld during the chilling process—each layer becomes more cohesive, creating a dessert that's both impressive and foolproof. No special equipment or baking skills are needed, just patience and attention to detail.
By the time you slice into this cheesecake, you'll be rewarded with a perfectly set dessert featuring creamy peanut butter swirls throughout a smooth, tangy cheesecake center. The texture is rich yet light, with just enough firmness to hold its shape when served.
This dessert is ideal for special occasions or when you want to impress guests without spending hours in the kitchen.
Serve chilled with fresh berries or a drizzle of melted chocolate for added elegance. The beauty of this recipe is its versatility—it works as a showstopper dessert or a satisfying treat for any occasion. Let's get started on creating this decadent no-bake masterpiece!
Ingredients for no bake reese's peanut butter cheesecake
Eight ingredients, two layers, zero oven. The secret to perfect no-bake texture lies in precise mixing and chilling.
| Ingredient | Amount | Notes |
|---|---|---|
| Cream Cheese (Full-Fat) 🧀 | 16 oz | Room temperature for smooth mixing |
| Peanut Butter (Creamy, No Sugar Added) 🥜 | 1 ½ cups | Natural peanut butter preferred |
| Powdered Sugar 🍚 | 1 ½ cups | Sifted for smooth texture |
| Unsalted Butter (Cold) 🧈 | 1 cup | Cut into small cubes |
| Graham Cracker Crumbs 🍪 | 1 ½ cups | Finely crushed, no large pieces |
| Heavy Cream (Cold) 🥛 | 1 cup | Chilled for stability |
| Vanilla Extract 🍯 | 1 tbsp | Pure extract preferred |
| Salt 🧂 | ¼ tsp | Fine sea salt |
| Reese's Peanut Butter Cups (Mini) 🍫 | 12 whole | Chopped into small pieces |
The cream cheese and butter form the backbone of this dessert. Philadelphia brand is ideal—it's the most reliable for texture. For the peanut butter, natural, no-sugar-added (like Smucker's) ensures the best flavor without altering the balance. The graham crackers? Honey Maid works perfectly, but any sturdy graham cracker will do. Keep the butter and heavy cream cold until ready to mix—they add structure that prevents melting during chilling. The powdered sugar should be sifted to avoid lumps, which can disrupt the smooth consistency of the filling.
No Reese's cups? Crushed peanut butter cups or chopped regular Reese's work in a pinch, though mini cups blend better for even distribution. Substituting powdered sugar with confectioners' sugar is fine, but avoid granulated—it won't dissolve properly. For a lighter texture, whipped cream cheese can replace half the regular cream cheese, but reduce the powdered sugar by 2 tbsp to maintain balance. If you're short on vanilla, vanilla bean paste adds depth, but pure extract is the standard. The salt is crucial—it enhances all flavors, so don't skip it.
This dessert requires 6-8 hours of chilling for optimal texture, though it can be made ahead. Store leftovers in an airtight container in the fridge for up to 5 days. For serving, a quick drizzle of melted chocolate or a sprinkle of crushed peanuts elevates presentation. The crust layer stays crispy when properly chilled, while the filling remains velvety. If the top seems too soft after chilling, return it to the fridge for another hour—patience ensures the perfect slice every time.
Why You'll Love This Recipe
- No Oven Needed: I swear by this recipe when I forget to pull out the cheesecake pan. Just mix, press, chill—no baking, no stress, no waiting for the oven to preheat. That cold butter in the crust keeps it crisp without any fuss.
- Reese’s Meets Cheesecake: Honestly, the combo is chef’s kiss—creamy peanut butter swirled into tangy cream cheese, then dusted with powdered sugar for that just-sweet-enough finish. It’s like eating a Reese’s cup, but with the texture of a dreamy dessert.
- Potluck Star: Between us, this is my go-to for parties because it travels well, looks impressive, and feeds a crowd without me standing over a hot oven. The graham cracker crust holds up, and no one ever guesses it’s no-bake.
- Budget-Friendly Indulgence: I make this all the time because it’s cheaper than store-bought cheesecake but tastes way better. Full-fat cream cheese and no-sugar-added peanut butter keep costs down, and leftovers? They disappear in two days—no guilt, just seconds.
Step-by-step instructions for no-bake Reese's peanut butter cheesecake
Here's how to assemble this decadent dessert without ever turning on the oven.
👨🍳 Step 1: Prepare the Crust Layer
In a medium bowl, combine the 1.5 cups graham cracker crumbs with 0.25 tsp salt and mix thoroughly. Press this mixture evenly into the bottom of a 9-inch springform pan, using the back of a measuring cup to create a compact, even layer. I like to tap the pan gently on the counter a few times to ensure the crumbs settle firmly—this prevents crumbling later.
Refrigerate the crust while you prepare the filling. The cold helps it set up properly before adding the wet ingredients. This chilling step is crucial—skipping it will make your crust soggy when the filling is added. I usually let it rest for 10-15 minutes while I work on the next components.
👨🍳 Step 2: Mix the Cheesecake Filling
In a large mixing bowl, beat the 16 oz cream cheese (full-fat) at medium speed until completely smooth, about 2-3 minutes. This step is critical—any lumps will translate to graininess in your finished cheesecake. Scrape down the sides of the bowl as needed to ensure even mixing.
Reduce the mixer speed to low and gradually add the 1.5 cups peanut butter (creamy, no sugar added) and 1.5 cups powdered sugar, mixing just until combined. The mixture will be thick and slightly sticky. Add the 1 tbsp vanilla extract and mix for another 30 seconds to fully incorporate. This is your base filling—set it aside while you prepare the swirl component.
🥘 Step 3: Create the Reese's Swirl
In a separate small bowl, combine the 1 cup heavy cream (cold) and 1 cup unsalted butter (cold). Whip this mixture with an electric mixer until it forms soft peaks—this should take about 2-3 minutes. The cold cream and butter will create a stable base for your swirl that won't melt prematurely.
In another small bowl, finely chop the 12 whole Reese's peanut butter cups (mini) into small pieces. Fold these chopped pieces into the whipped cream mixture along with 1 tbsp vanilla extract. The chopped Reese's should be evenly distributed throughout the cream. This swirl mixture needs to be ready immediately before combining with the cheesecake base.
🥘 Step 4: Assemble the Cheesecake
Spread the cheesecake filling evenly over the chilled crust in the springform pan. Use a spatula to create a smooth, level surface. This is where precision matters—you want an even layer so the swirl distributes properly. Tap the pan gently on the counter again to help the filling settle.
Spoon the Reese's cream mixture over the cheesecake filling, creating gentle swirls with the back of a spoon. Work quickly but carefully to maintain those beautiful marbled patterns. The contrast between the smooth peanut butter filling and the creamy Reese's swirls is what makes this dessert visually stunning. Place the assembled cheesecake in the refrigerator to set.
⏰ Step 5: Chill and Serve
Refrigerate the cheesecake for at least 4 hours, or preferably overnight. This extended chilling time allows all the components to fully set and meld together. The texture should be firm but still creamy when cut—no need for it to be rock-hard like a traditional baked cheesecake.
Before serving, run a knife around the edge of the pan to loosen it from the springform. Slide the cheesecake onto a serving plate and slice into wedges. Each piece should reveal those beautiful swirls of peanut butter and Reese's throughout the creamy filling. Serve chilled with fresh berries or a drizzle of melted chocolate for extra flair.
Pro Tips For Making No Bake Reese'S Peanut Butter Cheesecake
- Chill the Cream Cheese: Take the cream cheese out of the fridge at least 2 hours before mixing—it should be soft enough to scoop with a spoon, not melt like butter. I learned this the hard way when my first batch turned into a soupy mess because I rushed it. (Yes, even if you’re impatient like me.)
- Measure Butter by Weight: Use a kitchen scale for the cold butter—85g is the magic number for this recipe. Packing it too loosely means your crust will be greasy; overpacking makes it dense. I skip this step sometimes, and the texture always suffers.
- Press the Crust Firm: Don’t just dump the graham cracker crumbs and melted butter into the pan—press them down hard with a glass or your palm until it’s solid. I used to skip this, and the filling would leak out like a sad, runny dream.
- Whip the Peanut Butter: Beat the peanut butter with the cream cheese until it’s smooth and glossy—no streaks, no lumps. I was skeptical until I tried it: the texture changes from clumpy to silky, and the slices cut cleaner. (Your future self will thank you.)
Serving suggestions for this dish
Classic Presentation
Serve this cheesecake on a chilled dessert plate with a dusting of powdered sugar for an elegant finish. I like to use a 9-inch round plate to showcase the swirls beautifully.
A simple fresh raspberry or strawberry garnish on top adds vibrant color and a tart contrast to the rich peanut butter flavors. 🍓
Gourmet Toppings
For an elevated touch, drizzle melted dark chocolate (about 2 oz) in thin ribbons over the top. I recommend using Ghirardelli 60% dark chocolate for its rich flavor.
Another option is to sprinkle crushed salted peanuts for added crunch and texture. These toppings not only look stunning but also enhance the peanut butter experience.
Warm Complement
Pair this dessert with a warm cup of chai tea or hot cocoa to create a cozy contrast. The warmth of the beverage helps balance the cool, creamy texture of the cheesecake.
For a more indulgent pairing, serve with a peanut butter milkshake—just blend 1 cup milk, ½ cup peanut butter, and 1 scoop vanilla ice cream for a decadent treat.
Mini Dessert Bites
For parties or gatherings, cut the cheesecake into mini squares using a 2-inch round cutter or a sharp knife. Arrange them on a parchment-lined tray and refrigerate until ready to serve. These bite-sized portions are perfect for sharing and make the dessert feel even more special. 🍫
Seasonal Variations
In summer, top with whipped cream and fresh mint leaves for a refreshing twist. For fall, add caramel drizzle and toasted pecans to complement the peanut butter flavors.
Winter calls for a cinnamon-dusted finish or a sprinkle of crushed candy cane for a festive touch. These seasonal variations keep the dessert exciting year-round.
Make-Ahead Serving
This cheesecake tastes even better the next day, so it’s perfect for meal prep. Store leftovers in an airtight container in the fridge for up to 5 days. When ready to serve, let it sit at room temperature for 10-15 minutes to soften slightly.
This makes it ideal for last-minute gatherings or when you want to impress guests without last-minute stress. ✨
Nutrition facts
Frequently asked questions
Why does the crust need to chill before adding the filling?
Chilling the crust for 10-15 minutes prevents it from becoming soggy when the wet filling is added. The cold butter in the crust helps it maintain structure, while the filling stays stable during the 4+ hour chilling period. Skipping this step often leads to a crumbly base that falls apart when sliced.
Can I substitute regular peanut butter for natural peanut butter?
Yes, but expect slightly different results. Regular peanut butter with added sugar will make the filling sweeter and potentially softer. For best texture, use natural, no-sugar-added peanut butter and reduce powdered sugar by 1-2 tablespoons to maintain balance. The flavor difference is minimal in the final dessert.
What if my filling doesn't set properly after chilling?
If the center remains too soft, return it to the fridge for an additional 2-4 hours. Ensure your cream cheese was fully softened (not melted) and that all ingredients were properly mixed. For extra stability, add 1 extra tablespoon of powdered sugar to the filling before assembling. The key is patience—no-bake desserts need proper chilling time.
How do I make this recipe gluten-free?
Replace graham crackers with 1.5 cups gluten-free graham cracker crumbs or a mix of 1 cup almond flour and 0.5 cup melted butter pressed into the pan. For the filling, ensure all ingredients are certified gluten-free, especially peanut butter and chocolate toppings. The texture will be slightly different but still delicious.
Can I make this cheesecake ahead of time?
This dessert actually improves with time. Assemble it up to 24 hours in advance and store in an airtight container in the fridge. The flavors meld beautifully, and the texture becomes even more stable. Bring to room temperature for 15 minutes before serving for the best texture.