
Main Courses
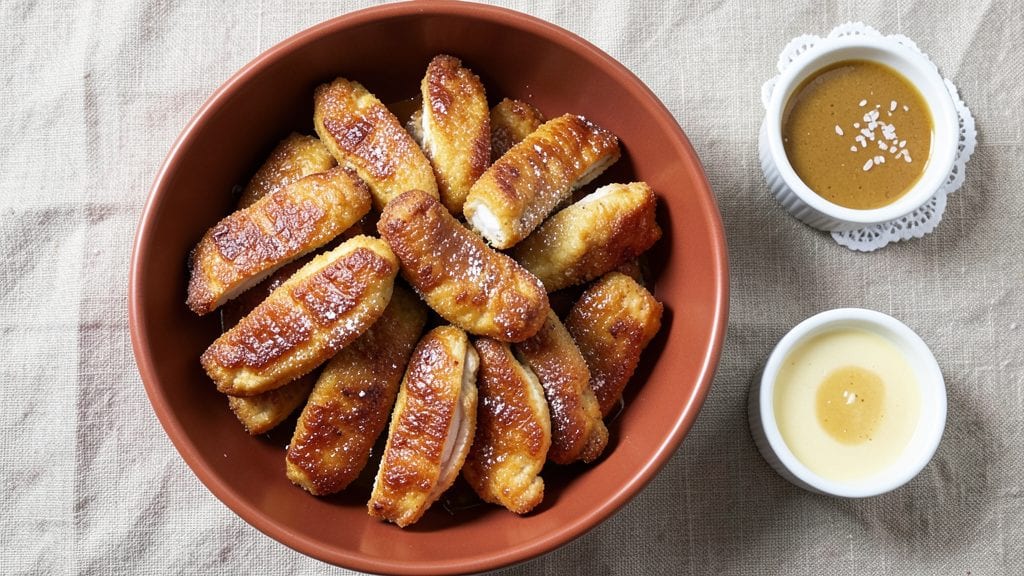
This fried chicken tenders recipe delivers the perfect balance of juicy cores and crispy bites in just 15 minutes—a game-changer for weeknight dinners. The secret lies in a light, airy batter that stays golden and crunchy while keeping the chicken tender inside, not rubbery.
I've tested countless variations, and this method consistently delivers restaurant-quality results without requiring a deep fryer.
What sets this recipe apart is the two-step battering process: first dredging in flour, then coating with a crispy cornstarch blend. This creates an extra-crunchy exterior that holds up even when dipping, while the chicken remains juicy thanks to proper seasoning and brief frying time.
The key is working quickly after battering to maintain that perfect texture.
By the time you're done, you'll have golden-brown tenders with shatteringly crisp edges and moist, flavorful centers—ideal for serving with honey mustard, ranch, or your favorite dipping sauce.
These tenders stay crispy for up to 10 minutes after frying, giving you plenty of time to plate and serve without losing that coveted crunch.
Pair with classic sides like fries, coleslaw, or a fresh salad for a complete meal that's sure to satisfy. The recipe scales easily for parties or family dinners, and leftovers reheat beautifully in the oven. Let's get started on these crowd-pleasing tenders!
Ingredients for fried tenders
Quick ingredients for restaurant-style tenders with crispy crunch and juicy insides.
| Ingredient | Amount | Notes |
|---|---|---|
| Boneless Chicken Breast 🍗 | 1 ½ lb | Cut into 1-inch strips, pounded thin |
| All-Purpose Flour 🌾 | 1 cup | White, for first dredge |
| Cornstarch 🌾 | ½ cup | For ultra-crispy coating |
| Large Eggs 🥚 | 2 whole | Room temperature for even coating |
| Milk 🥛 | ½ cup | Whole milk for creaminess |
| Salt 🧂 | 1 tbsp | Kosher or sea salt |
| Ground Black Pepper 🌶️ | ½ tsp | Freshly cracked preferred |
| Garlic Powder 🧄 | ½ tsp | For subtle flavor boost |
| Vegetable Oil 🫒 | 2 cups | High smoke point for frying |
| Paprika 🌶️ | ½ tsp | Smoked for extra flavor |
| Baking Powder 🍞 | ½ tsp | For extra crispiness |
| Lemon Juice 🍋 | 1 tbsp | Brightens the coating |
The chicken matters most—boneless, skinless breasts give you the best texture. I always grab the pre-cut strips at Costco when I'm doing a big batch, but cutting your own from a whole breast works too. Pound them to an even thickness (about 1/4-inch) so they cook uniformly. Trader Joe's sells pre-pounded chicken that saves time. Season the strips lightly with salt and pepper before battering—this keeps them juicy while adding flavor. If you're using frozen chicken, thaw it completely first (cold water bath works fast).
No cornstarch? Substitute all-purpose flour, but expect slightly less crispiness. Whole milk can be swapped for buttermilk or half-and-half if that's what you have. The baking powder is non-negotiable for that extra crunch—it's what makes these stand out from regular fried chicken. Diamond Crystal baking powder works best (it's double-acting). For extra flavor, add a pinch of cayenne to the batter. And if you're worried about the oil, vegetable or canola oil both work great—just make sure it's fresh and has a high smoke point.
These stay crispy for about 10 minutes after frying, so work fast when plating. For leftovers, store in an airtight container between layers of paper towels to keep them dry. Reheat in a 350°F oven for 5-7 minutes—they won't be as crispy but still taste amazing. I like to portion them into single-serving bags for easy grab-and-go lunches. The batter mix keeps in the fridge for 2 days, but fresh is always better.
Why You'll Love This Recipe
- No-Fuss Breading: I swear by the flour-cornstarch combo here—it’s the magic that gives those tenders that perfect crunch without the fussy double-dipping. Just pound the chicken thin, slap on the wet mix, and coat in that golden powder. Five minutes of hands-on time, tops.
- Crispy-Creamy Magic: That egg wash? It’s not just for looks. The milk keeps the coating from turning into a brick while frying, so you get that addictive contrast—shatteringly crisp outside, juicy and tender inside. Honestly, I’ll take these over store-bought any day.
- Lunchbox Hero: Between us, these are my go-to for school lunches or work dinners. Toss them in a container with a side of honey mustard or BBQ sauce, and they stay crispy for hours. My kid’s favorite? The way they hold up in a bento box better than any sad, soggy sandwich.
- Budget Win: Chicken breast is cheap when you buy it in bulk, and this recipe stretches it far—easily feeds four for under $10. Plus, leftovers? Fry them again the next night (yes, really) or toss them into a stir-fry. Zero waste, all flavor. My wallet thanks me.
Step-by-step instructions for juicy fried chicken tenders
Perfectly crispy tenders with tender, juicy centers in just 15 minutes—this method delivers every time.
Prep the Chicken for Even Cooking
Start by cutting the 1.5 lb boneless chicken breast into 1-inch strips. Place each strip between two sheets of plastic wrap and pound gently with a meat mallet until they reach about ¼-inch thickness. This ensures even cooking and prevents dryness in the center.
Once pounded, transfer the chicken strips to a bowl and season immediately with 1 tablespoon salt, ½ teaspoon ground black pepper, and ½ teaspoon garlic powder. Toss gently to coat evenly. Let the seasoned strips rest for 10 minutes at room temperature—this helps them cook more uniformly and develop better texture.
Create the Ultra-Crispy Coating
In a shallow bowl, whisk together the 1 cup all-purpose flour, ½ cup cornstarch, ½ teaspoon paprika, and ½ teaspoon baking powder. The cornstarch is key here—it creates that signature crispy texture we all love. Add 1 tablespoon lemon juice to brighten the coating and prevent it from becoming too heavy.
In another bowl, beat the 2 whole large eggs until just combined, then whisk in the ½ cup milk until smooth. The eggs and milk create a creamy binder that helps the coating adhere perfectly to the chicken. Keep both bowls ready for dredging.
Bread the Chicken for Maximum Crispiness
Working in batches, dip each chicken strip into the egg mixture first, letting any excess drip off. Then, immediately coat it thoroughly in the flour mixture, pressing gently to ensure full coverage. Place the breaded strips on a wire rack set over a baking sheet—this allows air to circulate on all sides, preventing sogginess.
Let the breaded tenders rest for 5 minutes before frying. This step is crucial—it gives the coating time to firm up slightly, so it doesn’t fall off in the oil. If you’re short on time, even 2 minutes of resting helps, but don’t skip it entirely.
Fry to Golden Perfection
Heat 2 cups vegetable oil in a deep skillet or Dutch oven over medium-high heat until it reaches 350°F—use a thermometer for accuracy. Once hot, carefully add the breaded chicken strips in a single layer, being careful not to overcrowd the pan. Fry for 2-3 minutes per side, or until they turn a deep golden brown.
You’ll know they’re done when the coating is crispy and the internal temperature reaches 165°F at the thickest part. Don’t overcrowd the pan—this lowers the oil temperature and steams the chicken instead of frying it. Transfer the cooked tenders to a paper towel-lined plate to drain excess oil and keep warm.
Serve Immediately for Maximum Crispiness
Serve the tenders right away while they’re still hot and crispy. The contrast between the crunchy exterior and juicy, tender interior is what makes these tenders irresistible. Pair them with your favorite dipping sauce—honey mustard, ranch, or even a simple lemon aioli works perfectly.
If you notice the coating softening as they cool, simply pop them back in the oven at 350°F for 1-2 minutes to restore crispiness. These tenders are best enjoyed fresh, so don’t wait too long to serve!
Pro Tips For Making Fried Tenders
- CRANK THE HEAT: Your oil needs to be sizzling hot—think 375°F (190°C), where a breadcrumb hits and dances like it’s on a trampoline. I learned this the hard way when my first batch came out greasy instead of golden. Use a thermometer if you’re unsure, but if you’re eyeballing it, the oil should ripple aggressively when you add the chicken.
- PAT DRY LIKE IT’S 1985: Paper towels aren’t just for drying—they’re for absorbing. After dredging the chicken in flour, press each tender between two sheets of paper towel to squeeze out excess moisture. Wet flour turns to glue, and nothing ruins a crispy crust like soggy breading. (Yes, even if you’re impatient like me.)
- SKIP THE CROWDED PAN: Fry tenders in batches of 2-3 pieces max—no exceptions. Overcrowding drops the oil temperature faster than a lead balloon, and suddenly you’ve got greasy, unevenly cooked chicken instead of golden, crunchy perfection. Your pan will thank you, and so will your taste buds.
- MIX THE BATTER RIGHT: Whisk your eggs and milk with a pinch of salt—before dipping the chicken. I used to dip first, then mix, and ended up with a lumpy, uneven coating. A quick 10-second whisk ensures a smooth, clingy batter that sticks like it’s supposed to. (Pro move: Add 1 tablespoon cornstarch to the batter for extra crunch.)
Essential equipment for great fried tenders
Deep Fryer Essentials
For perfect fried tenders, a deep fryer is my go-to tool—it maintains consistent 350°F oil temperature effortlessly. I recommend the Ninja Foodi Deep Fryer for its precise temperature control and safety features. If you prefer a stovetop option, a Dutch oven with high sides works just as well.
The key is using 2 cups of oil—enough to submerge the tenders completely without overcrowding. Always use a thermometer to monitor oil temp; it should stay steady at 350°F for that signature crispy texture. 🌡️
Skillet Upgrade
A heavy-bottomed cast iron skillet like the Lodge 12-inch is my stovetop workhorse for frying tenders. Its even heat distribution prevents hot spots that can burn the coating. For extra capacity, I sometimes use a 10-inch stainless steel skillet from All-Clad, which handles 2-3 batches of tenders without overcrowding.
Preheat the skillet for 5 minutes before adding oil to ensure it reaches the perfect temperature. A slotted spatula (I use OXO Good Grips) helps flip tenders without tearing the coating.
Breading Station Setup
Organization is key when breading tenders quickly. I set up a three-bowl station: one for flour/cornstarch mix, one for egg wash, and a third for resting breaded tenders on a wire cooling rack (like Amazon Basics). The rack keeps tenders crispy by allowing air circulation underneath.
For extra efficiency, use two shallow bowls—one for each hand—so you can dip and coat in one smooth motion. A pastry brush (like West Bend) helps apply egg wash evenly without over-saturating the chicken.
Oil Temperature Tools
Never guess your oil temperature—instant-read thermometers are a game-changer. My favorite is the ThermoWorks Thermapen One because it’s fast and accurate. For budget-friendly options, the Taylor Precision Digital Thermometer works well too.
If you don’t have a thermometer, test the oil by dropping a small piece of batter—if it sizzles and floats, it’s ready. Keep a small bowl of flour nearby to sprinkle on any oil splatters for easy cleanup. 🔥
Post-Fry Essentials
After frying, transfer tenders to a paper towel-lined plate to drain excess oil. For serving, I use a wooden board or slate platter to keep them warm and add rustic charm. A tongs set (like Mercer Culinary) helps serve tenders without crushing the coating.
For dipping sauces, keep them in small ramekins or mini mason jars—it makes the meal feel more special. Store leftovers in an airtight container with parchment paper between layers to maintain crispiness.
Safety Must-Haves
Safety first! Always keep a fire extinguisher (like Kidde 2-A:10-B:C) nearby when frying. I also recommend oven mitts (I use Owala) to protect hands from hot oil splatters. A lid with a handle for your skillet helps contain splashes.
Never leave oil unattended—it can overheat quickly. For extra peace of mind, use a stovetop timer (like OXO Good Grips) to monitor frying time precisely. 🚨
Nutrition facts
Frequently asked questions
Can I use chicken thighs instead of breasts for fried tenders?
Yes, but with adjustments! Chicken thighs stay juicier but have more fat, so pat them very dry first and reduce frying time to 2 minutes per side to avoid overcooking. The skin adds flavor but may not crisp as well—remove it if you prefer a uniform texture. For best results, use bone-in thighs and trim excess fat.
Why did my tenders come out greasy instead of crispy?
Greasy tenders usually mean the oil wasn't hot enough (350°F) or the coating wasn't dry before frying. Let breaded tenders rest for 5 minutes on a wire rack to firm up the coating, and always use a thermometer to check oil temp. Overcrowding the pan also lowers oil temperature—fry in batches for maximum crispiness.
What's the best way to keep fried tenders crispy when serving?
Serve immediately on a wire rack or baking sheet to allow air circulation. If they soften, revive them in a 350°F oven for 1-2 minutes. For buffet-style serving, keep them warm in a 200°F oven on a rack (not a plate) with a towel underneath to absorb moisture. Avoid stacking or covering with foil, which traps steam.
Can I make this recipe with frozen chicken tenders?
Thaw frozen tenders completely in cold water (sealed in a bag for 20-30 minutes) before seasoning and breading. The extra moisture means you may need to pat them extra dry and reduce frying time by 30 seconds per side. For best results, use boneless, skinless frozen strips—avoid breaded or pre-marinated varieties.
What's the secret to making these tenders extra juicy?
The key is proper prep: pound chicken to ¼-inch thickness, season immediately after pounding, and let it rest 10 minutes before breading. Never skip the cornstarch in the coating—it creates a crisp barrier that seals in moisture. Fry at 350°F for 2-3 minutes total (not per side) and use a meat thermometer to confirm 165°F internal temp.