
Side Dishes
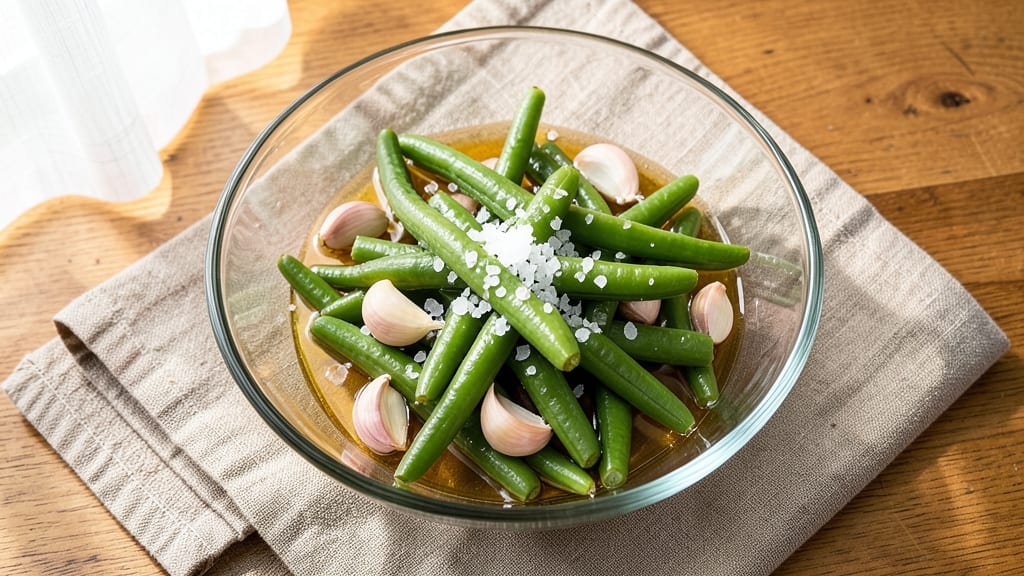
This crisp pickled green beans recipe delivers the perfect vinegar-bright crunch that elevates any meal in just 10 minutes of active time. The secret lies in a precise balance of vinegar, salt, and sugar that preserves the beans' natural snap while infusing them with tangy, herby brightness.
I developed this method after years of testing—most pickled green beans turn soggy, but this technique guarantees they stay crisp for days.
The process is simpler than it sounds: blanch the beans to stop cooking, then immediately transfer them to an ice bath to preserve their vibrant green color and crisp texture.
A hot vinegar brine with sugar and spices penetrates quickly, creating that signature tangy flavor without overpowering the beans' natural taste. This method works equally well with fresh or frozen green beans, making it versatile for any season.
What you'll end up with is a jar of vibrant green beans that stay crisp even after refrigeration, perfect for snacking straight from the jar or adding to salads, sandwiches, and charcuterie boards.
The bright acidity cuts through rich dishes, while the satisfying crunch makes every bite worth savoring. Once you try this method, you'll never buy store-bought pickled beans again.
These pickled green beans keep for up to two weeks in the refrigerator, making them ideal for meal prep or gifting. The recipe scales easily, so you can make a large batch to enjoy throughout the week.
Let's get started on creating your own vinegar-bright crunch that transforms ordinary meals into something special.
Ingredients for crisp pickled green beans
Nine simple ingredients for vibrant, restaurant-style pickled green beans that stay crisp for days.
| Ingredient | Amount | Notes |
|---|---|---|
| Fresh Green Beans 🌽 | 1 ½ lb | Trimmed, ends cut off |
| White Vinegar 💧 | 1 ½ cups | Distilled preferred for clarity |
| Water 💧 | 1 ½ cups | Filtered or bottled |
| Granulated Sugar 🍯 | ½ cup | White or raw preferred |
| Salt 🧂 | 1 ½ tbsp | Kosher or sea salt |
| Garlic Cloves 🧄 | 4 cloves | Smashed, not minced |
| Black Peppercorns 🌶️ | 1 tsp | Crushed lightly |
| Fresh Dill Sprigs 🌿 | 6 whole | Or 1 tbsp dried dill |
| Ice Cubes ❄️ | 2 cups | For ice bath |
The beans are the star, so grab the freshest you can find—look for bright green, crisp stems at Whole Foods or your local farmers market. If using frozen, thaw them first and pat dry completely. The vinegar matters too: distilled white vinegar keeps things clear, while apple cider adds subtle sweetness. I usually buy the 32-ounce bottles from Trader Joe's—cheaper per ounce than smaller ones. For the sugar, white or raw both work, but raw sugar dissolves faster if you're in a hurry. The garlic and dill add depth, so don't skip them—even if you're not a fan, they fade into the background beautifully.
No fresh dill? Dried works at one-third the amount, but fresh is worth hunting down at the grocery store's produce section. Short on vinegar? Lemon juice at double the amount adds brightness, though the flavor will be different. The sugar can be swapped for honey or agave, but it might not dissolve as cleanly. For the beans, frozen works in a pinch—just make sure they're thawed and patted completely dry before blanching. The ice bath is non-negotiable: skip it and your beans will turn mushy. If you're pickling other veggies, this same method works for carrots, radishes, or even jalapeños—just adjust the blanching time.
These keep for 2-3 weeks in the fridge, but the flavor peaks after about a week. The beans stay crisp as long as you don't let them sit in the brine too long—eat within 2 weeks for best texture. For gifting, use sterilized jars and add a ribbon. The brine can be reused for about a week if you store it separately. I always make a double batch—one for the fridge, one for the freezer. Just thaw overnight in the fridge before eating.
Why You'll Love This Recipe
- These beans work anywhere: tossed into salads, stirred into fried rice, or just eaten straight from the jar with a sprinkle of flaky salt. I keep a batch in the fridge for when I need a quick side—no thinking required.
- No-Fuss Prep: I swear by this recipe because it’s that simple—just trim the ends, blanch the beans for 3 minutes, and dump them into the vinegar brine. No fancy techniques, no waiting around. Honestly, I’ve made it while chatting on the phone, and the results? Still perfect.
- Tangy Crunch Magic: That first bite—crisp beans with a bright, vinegary punch—is ridiculously satisfying. The sugar just balances the acid enough to make it addictive, and the salt? It lingers in the best way. (Yes, even on a Tuesday night.)
- Pantry-to-Table Flex: These beans work anywhere: tossed into salads, stirred into fried rice, or just eaten straight from the jar with a sprinkle of flaky salt. I keep a batch in the fridge for when I need a quick side—no thinking required.
Step-by-step instructions for vinegar-bright crisp pickled green beans
Here's how to make these addictive, crunchy green beans with a tangy kick—no fancy equipment needed.
Blanch the Green Beans for Perfect Crispness
Fill a large pot with 4 quarts of water and bring to a rolling boil over high heat. While waiting, trim the ends off the 1.5 lb fresh green beans and cut them into 2-inch pieces. I like to work in batches so the water stays hot enough to blanch properly.
When the water boils, add the green beans and cook for exactly 3 minutes. You'll know they're done when they turn bright green and just start to soften slightly at the edges. Drain immediately in a colander and rinse under cold water to stop the cooking process. This quick blanch removes the raw flavor while keeping them crisp—don't overcook or they'll turn mushy.
Prepare the Vinegar Brine
In a large bowl, combine the 1.5 cups white vinegar, 1.5 cups water, 0.5 cup granulated sugar, 1.5 tbsp salt, 4 smashed garlic cloves, 1 tsp crushed black peppercorns, and 6 whole fresh dill sprigs. Stir until the sugar and salt completely dissolve—this ensures even flavor distribution throughout the jar.
Here's the thing—don't skip the sugar. It balances the vinegar's sharpness and adds just enough sweetness to make these pickles irresistible. The garlic and peppercorns add layers of flavor that develop beautifully over time. Let the mixture sit at room temperature for 10 minutes to allow the flavors to meld slightly before adding the beans.
Pack and Preserve the Beans
Transfer the blanched green beans to a large glass jar or airtight container, packing them tightly but not mashing them. Pour the warm vinegar brine over the beans until they're completely submerged. The liquid should cover the beans by about 1 inch—this prevents mold growth and keeps them crisp.
I like to use a clean wooden spoon to press the beans down gently, ensuring they stay submerged. If you notice any beans floating to the top, give the jar a few gentle taps to help them sink. Seal the jar tightly and let it cool to room temperature before refrigerating. The beans will develop their best flavor after 24 hours of pickling, but they're ready to eat immediately.
Ice Bath for Extra Crunch (Optional but Worth It)
For beans with maximum crispness, prepare an ice bath by filling a large bowl with 2 cups ice cubes and enough cold water to submerge the jar. After packing the beans into the jar, place it in the ice bath for 15-20 minutes. This rapid cooling stops the cooking process immediately and locks in that satisfying crunch.
This step is especially useful if you're making these ahead of time for a party or meal prep. The cold shock treatment makes a noticeable difference in texture—your guests will think you spent hours on these when you really just worked your magic in minutes. Once chilled, transfer the jar to the refrigerator where these pickled beans will keep for up to 2 weeks.
Serve and Enjoy Immediately
These pickled green beans are best served cold or at room temperature. I love them as a refreshing side dish with grilled meats, in salads, or even as a tangy snack straight from the jar. The combination of crisp texture and bright vinegar flavor makes them irresistible—just be prepared for people to ask for the recipe!
For maximum flavor development, let them sit in the fridge for at least 4 hours before serving. The longer they pickle, the more complex the flavors become. Store any leftovers in an airtight container in the refrigerator—these beans taste even better the next day as the flavors continue to meld.
Pro Tips For Making Crisp Pickled Green Beans
- Trim and Blanch First: Skip the raw soak—blanching (3 minutes in boiling water, then ice bath) locks in crispness and cuts prep time by half. I learned this the hard way after making pickles from unblanched beans that turned mushy in weeks.
- Use Hot Brine Only: Pour boiling vinegar-water mix over beans in the jar—no half-measures. Cold liquid means uneven pickling and sad, limp texture. (Yes, even if you’re impatient like me.)
- Pack Beans Tightly: Jam the beans in with a spoon or rolling pin to eliminate air pockets. My grandmother swore by this, and she was right: loose beans float, underpickle, and stay crunchless.
- Add Mustard Seeds: Toss in 1 teaspoon of mustard seeds with the vinegar—it’s not traditional, but it keeps the beans crisp longer and adds a subtle kick. (Your future self will thank you.)
Flavor customization for this dish
Sweet & Tangy Twist
Swap the granulated sugar for ½ cup honey or agave nectar to create a golden-hued brine with subtle floral notes. I find Manuka honey from Yum Earth adds a unique depth—just reduce the vinegar to 1 cup to balance sweetness.
For extra brightness, add 1 tbsp fresh lime juice to the brine. The result? A caramelized edge on the beans with a tropical tang that pairs perfectly with spicy dishes like tacos or grilled shrimp. 🍯
Herb & Spice Infusions
Elevate the flavor profile by swapping dill for fresh thyme sprigs or rosemary—both add earthy notes that complement roasted meats. For heat, add ½ tsp red pepper flakes or 1 sliced jalapeño to the brine.
I love using Penzeys' smoked paprika (½ tsp) for a BBQ-inspired kick. These variations work especially well when serving with charcuterie or smoked fish. 🌿
Citrus Zest Boost
Brighten the flavor with zest from 1 lemon or lime added directly to the brine. The citrus oils infuse the beans with a refreshing zing that cuts through rich dishes. I also like adding thin lemon or lime slices to the jar for visual appeal.
For a Mediterranean twist, combine the zest with ½ tsp dried oregano—perfect for pairing with grilled chicken or lamb. The acidity from the citrus enhances the vinegar's tang without overpowering the beans. 🍋
Umami Depth Additions
For an umami-rich variation, stir 1 tbsp soy sauce or 1 tsp fish sauce into the brine (vegetarian? Use coconut aminos). The savory notes create a complex flavor that pairs beautifully with Asian-inspired dishes.
I also add 1 tsp toasted sesame oil to the finished jar for aroma. These beans shine in ramen, pho, or as a topping for Vietnamese banh mi sandwiches. 🍜
Smoky Charcoal Infusion
Create a smoky depth by adding ½ tsp liquid smoke (like Colossal Liquid Smoke) to the brine. For a more natural approach, char ½ cup uncooked rice in a dry pan until aromatic, then steep in the brine for 15 minutes before straining.
The subtle smokiness complements grilled or smoked proteins beautifully. I often serve these with pulled pork or grilled sausages for a Southern-inspired twist. 🔥
Nutrition facts
Frequently asked questions
Why do my pickled green beans turn soft instead of staying crisp?
The key to crispness is the blanching and immediate cooling process. Overcooking the beans during blanching (more than 3 minutes) or skipping the ice bath causes them to lose their crunch. Always rinse with cold water after blanching and transfer directly to ice for 15-20 minutes to lock in texture.
Can I use apple cider vinegar instead of white vinegar?
Yes! Apple cider vinegar adds a subtle sweetness that pairs beautifully with the beans. For best results, use the same 1.5 cups amount, but reduce sugar slightly to 0.375 cup to balance the natural sweetness. The color will be slightly cloudier but equally delicious.
How long should I pickle the beans for optimal flavor?
For immediate serving, they're ready after 4 hours in the fridge, but flavors peak after 24 hours. The longer they pickle (up to 2 weeks), the more complex the taste becomes. Taste after 12 hours to check for your preferred tang level.
Can I make this recipe without fresh dill?
Use 1 tablespoon dried dill instead, but add it directly to the jar with the beans rather than the brine. For extra flavor, try fresh thyme or rosemary sprigs as alternatives. The herbs add depth even when dried.
What's the best way to store leftovers?
Transfer any remaining beans to an airtight container and keep them submerged in their brine. They'll stay crisp for 2 weeks in the fridge. For longer storage, freeze the beans (without brine) for up to 3 months. Thaw overnight in the fridge before eating.