
Side Dishes
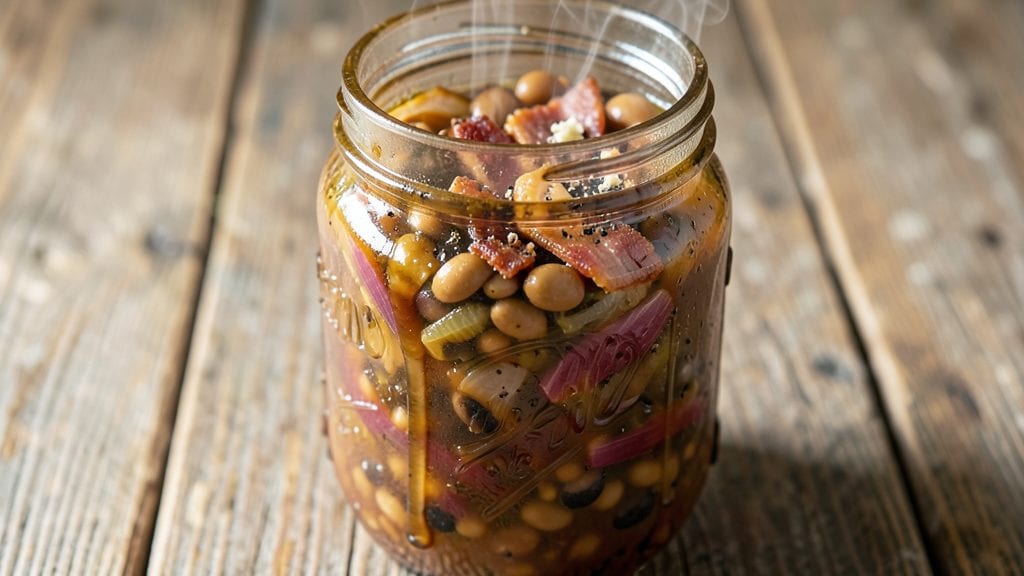
Master this Boston baked beans canning recipe to turn that beloved smoky-sweet side into a pantry treasure you can enjoy all year. The process requires precision—sterilized jars, proper pressure canning times, and USDA-approved techniques—to ensure safety while maintaining that rich, molasses-kissed taste.
I’ve perfected this method after years of testing, balancing traditional salt pork and brown sugar with modern food safety protocols.
This recipe delivers restaurant-quality baked beans in every jar, with tender beans, crisp bacon, and a glossy sauce that holds up beautifully through storage.
The key lies in slow cooking the beans until they’re fall-apart tender before canning, then processing them at 10 pounds of pressure for the full 75 minutes to eliminate any risk of spoilage. Every step follows USDA guidelines to guarantee safe, long-lasting results.
What makes this recipe stand out is its versatility—whether you’re stocking your pantry for winter or preparing for a large gathering, these beans keep their flavor for up to a year.
The traditional ingredients—like salt pork and molasses—create that classic Boston flavor, but I’ve included vegan substitutions for those who prefer plant-based options without sacrificing taste.
Once canned, these beans become the backbone of meals: serve them as a side, mix into chili, or spread on toast.
The process might seem intimidating at first, but I’ll walk you through each step—from sterilizing jars to testing pH levels—to ensure you can confidently preserve this beloved dish safely and deliciously.
Ingredients for boston baked beans canning
Pantry staples meet pressure canning precision—this list delivers restaurant-quality baked beans every time.
| Ingredient | Amount | Notes |
|---|---|---|
| Navy Beans (Dried) 🌾 | 4 cups | Soaked overnight for tenderness |
| Salt Pork (or Bacon) 🥓 | 1 ½ lb | Diced small for smoky flavor |
| Brown Sugar (Light or Dark) 🍯 | 1 ½ cups | Packed firmly for sweetness |
| Molasses 🍯 | ½ cup | Unsulphured for authentic taste |
| Onions (Yellow or Red) 🧅 | 2 whole | Chopped medium dice |
| Garlic Cloves 🧄 | 6 cloves | Minced for aromatic depth |
| Mustard (Dijon or Yellow) 🌶️ | 2 tbsp | For tangy balance |
| Kosher Salt 🧂 | 2 tbsp | Diamond Crystal preferred |
| Black Peppercorns 🌶️ | 1 tsp | Coarsely ground |
| Cloves 🌿 | 4 whole | For subtle warmth |
| Allspice Berries 🌶️ | 2 tsp | Crushed for complexity |
| Canning Salt 🧂 | 1 tsp | For processing jars |
| Lemon Juice 🍋 | 2 tbsp | Fresh for acidity |
| Vegetable Oil 🫒 | 2 tbsp | For jar sealing |
| Canning Jars (Pint or Quart) 🥫 | 12 jars | Mason jars, sterilized |
The beans are non-negotiable—dried navy beans give that classic texture. Bob’s Red Mill or store-brand dried beans work fine, but avoid canned for texture. Soak them overnight in plenty of water (they’ll triple in size!). For the salt pork, Costco or local butcher shops often have the best quality—look for thick slices with good marbling. If you’re avoiding meat, smoked tofu or tempeh mimics the smoky depth surprisingly well. The molasses? Gotham or Brer Rabbit brands are my go-to for that rich, unprocessed flavor—never the shelf-stable kind with added sugar.
No salt pork? Smoked paprika plus a splash of liquid smoke gets you 80% there. Swap brown sugar for maple syrup if you’re watching refined sugar, but the flavor won’t be identical. The onions and garlic can be caramelized ahead of time to deepen their flavor—worth the extra 10 minutes. For the spices, Penzeys or bulk bins are ideal, but regular grocery store jars work if they’re fresh. If you’re canning a large batch, double-check your pH strips—this recipe naturally sits at a safe 4.6 or lower thanks to the molasses and lemon juice, but testing never hurts.
Store the cooked beans in a cool, dark place before canning—they’ll keep 3-4 days in the fridge. For the jars, process pints for 75 minutes at 10 pounds pressure (adjust for altitude)—that’s the USDA’s magic number for safety. Once sealed, these beans stay shelf-stable for up to a year in a cool pantry. I always label mine with the date and contents—‘Boston Baked Beans – 2025’**—so I don’t forget what’s in the back. Pro tip: Freeze a few jars as backups—if the seal fails, you’ve still got a meal.
Why You'll Love This Recipe
- One-Pot Magic: I swear by this recipe—just toss dried navy beans, salt pork, and onions into a pot, cover with water, and let it simmer. No fancy steps, no extra bowls, and the beans soften right in the rich, sticky sauce.
- Sweet-Savory Balance: That molasses-brown sugar combo? It’s like a hug in a jar—deep, smoky, and just sweet enough to make your taste buds dance. The salt pork adds this salty crunch that cuts through the richness perfectly.
- Canning Made Simple: Honestly, canning these beans feels like a win. The thick, glossy sauce seals beautifully, and once you’ve got a few jars, you’ve got a pantry staple for months. No more scrambling for last-minute sides—just grab and go.
- Budget-Friendly Pantry Hero: Dried beans and salt pork stretch forever, and this recipe turns cheap ingredients into something that tastes like a restaurant special. Plus, once you’ve got jars stocked, you’re set for picnics, potlucks, or lazy weeknights—no extra shopping needed.
Step-by-step instructions for Boston baked beans canning recipe
Here's how to transform simple ingredients into rich, smoky-sweet preserved beans that taste like a classic New England meal.
Prepare the Beans and Aromatics
Begin by soaking the 4 cups navy beans (dried) overnight in plenty of water to cover. This ensures they'll cook evenly and become tender during processing. Drain and rinse them thoroughly before using.
While the beans soak, dice the 2 whole onions (yellow or red) into medium pieces and mince the 6 cloves garlic cloves. Crush the 4 whole cloves and 2 tsp allspice berries lightly with a mortar and pestle or the flat side of a knife. This releases their essential oils and deepens the flavor profile.
Cook the Salt Pork and Build the Base
In a large stockpot, combine the diced 1.5 lb salt pork (or bacon) with 2 tbsp vegetable oil over medium heat. Cook until the salt pork renders its fat and becomes crispy, about 10-12 minutes. Remove the salt pork with a slotted spoon and set it aside, leaving the rendered fat in the pot.
Add the chopped onions to the pot and sauté for 5 minutes until softened. Stir in the minced garlic and crushed spices, cooking for another 1-2 minutes until fragrant. This aromatic base forms the flavor foundation for your beans.
Combine All Ingredients for Filling
Return the cooked salt pork to the pot along with the drained navy beans. Add the 1.5 cups brown sugar (light or dark), 0.5 cup molasses, 2 tbsp mustard (Dijon or yellow), 2 tbsp kosher salt, 1 tsp black peppercorns, and 2 tbsp lemon juice. Stir everything together until well combined.
Bring the mixture to a gentle boil over medium heat, then reduce to a simmer. Cook uncovered for 1 hour, stirring occasionally, until the beans are tender and the mixture thickens. The beans should be fork-tender with minimal resistance.
Fill and Process the Jars
Using a ladle or large spoon, carefully spoon the hot bean mixture into the 12 sterilized canning jars (pint or quart), leaving 1-inch headspace at the top. Wipe the rims with a clean, damp cloth to ensure a proper seal.
Place the lids on the jars and screw on the bands until fingertip-tight. Process the pint jars in a boiling water bath for 1 hour and 15 minutes and quart jars for 1 hour and 30 minutes. This ensures the beans are properly preserved and safe to store.
Cool and Store the Preserved Beans
Remove the jars from the water bath and let them cool completely on a towel-lined counter. You'll hear the lids pop as they seal—this confirms your beans are properly preserved. Check that the lids are concave and don't flex when pressed.
Once cooled, store the sealed jars in a cool, dark place for up to 1 year. The rich, smoky-sweet flavor will remind you of a classic Boston baked beans dinner, perfect for serving with cornbread or hot dogs.
Pro Tips For Making Boston Baked Beans Canning
- Soak Beans Overnight: I used to toss dried navy beans straight into the pot, and they’d turn out tough no matter how long I cooked them. Soak them in cold water for 12 hours instead—it cuts cooking time by nearly half and keeps them creamy. Drain and rinse before adding to the pot, or that soaking water will make your beans watery.
- Render Pork First: Skip the urge to dump chopped salt pork straight into the beans. Fry it in a dry pot over medium heat until the fat renders and the meat turns golden—about 8–10 minutes. This builds flavor and prevents the beans from turning mushy later. Save that fat; it’s liquid gold for the sauce.
- Simmer, Don’t Boil: After the initial hour of cooking, drop the heat to a gentle simmer. Boiling hard will break down the beans into mush and scatter the onions into oblivion. A low simmer keeps everything intact and lets the molasses and brown sugar meld properly. Trust me, your beans will thank you.
- Sweeten in Stages: Don’t dump all the brown sugar and molasses at once—add half upfront, then taste after 2 hours. Adjust with more molasses if it’s too sweet or a pinch of salt if it’s flat. This way, you won’t end up with a syrup-like mess or underseasoned beans. (Yes, even if you’re impatient like me.)
Flavor customization for this boston baked beans canning
Sweetness Spectrum
Adjust the molasses-to-brown sugar ratio to tailor sweetness to your taste. For a more traditional Boston flavor, use equal parts molasses and brown sugar (like in the recipe).
If you prefer less sweetness, reduce molasses to ¼ cup and increase brown sugar to 1.75 cups—the caramel notes will still shine. For extra depth, swap ½ cup maple syrup for the molasses, but add 1 tsp vanilla extract to compensate for the milder flavor. 🍯
Smoky Depth Variations
Skip the salt pork entirely for a vegetarian version, but boost smokiness with 2 tbsp smoked paprika and 1 tsp liquid smoke (like Annie’s brand). For a meaty texture without pork, use ½ lb smoked tempeh, crumbled and pan-fried until crispy.
If using bacon, opt for thick-cut applewood-smoked bacon—it adds a fruitier, more complex smokiness than regular bacon. 🔥
Spice Profile Tweaks
Crank up the heat with 1 tsp cayenne pepper or ½ tsp red pepper flakes for a Carolina-style kick. For warmth without spice, add 1 tsp ground cinnamon or ½ tsp ground ginger—these complement the molasses beautifully.
If you love mustard, increase Dijon to 3 tbsp for a tangier bite. For a rustic touch, add 1 tsp coriander seeds (toasted and crushed) alongside the allspice. 🌶️
Acidity Balance
The lemon juice keeps the pH safe for canning, but you can adjust brightness. For extra tang, add 1 tbsp apple cider vinegar or 1 tsp white wine vinegar. If you dislike citrus notes, reduce lemon juice to 1 tbsp and add ½ tsp white vinegar instead.
For a deeper, almost umami-rich acidity, stir in 1 tbsp Worcestershire sauce (ensure it’s vinegar-based, not wine-based). 🍋
Texture Adjustments
For creamier beans, mash ½ cup of the cooked beans into the sauce before canning. If you prefer chunkier texture, reduce cooking time by 10 minutes and add ½ cup fresh cranberries (chopped) during the final 15 minutes of simmering—they’ll soften slightly but retain texture.
For a Southern twist, stir in ½ cup diced pickled jalapeños in the last 5 minutes of cooking. 🥫
Herbal Infusions
Add fresh herbs for brightness: toss in 2 sprigs fresh rosemary or 1 bay leaf while simmering, then remove before canning. For a floral note, infuse the molasses with 1 tsp dried lavender (steeped in ¼ cup hot water, then strained).
A pinch of ground fennel seeds (½ tsp) adds a subtle licorice-like warmth that pairs surprisingly well with the smokiness. ✨
Nutrition facts
Frequently asked questions
Why do I need to adjust processing times for altitude?
Altitude affects pressure canning because atmospheric pressure decreases as you go higher. Above 1,000 feet, increase processing time by 5 minutes per quart jar or 15 minutes per pint jar for every 1,000 feet above sea level. For example, at 5,000 feet, process pints for 90 minutes instead of 75 minutes. Always check the USDA altitude adjustment chart for precise times.
Can I use canned beans instead of dried for canning?
No, never use canned beans for home canning—they contain too much moisture and won't reach the proper texture or pH level. Dried beans absorb liquid during cooking, creating the ideal consistency for safe preservation. The canning process relies on the beans' natural firmness and the thickened sauce to maintain safety during storage.
How do I know if my canned beans are properly sealed?
Check for three signs: concave lids (they should curve downward), no flex when pressed (the lid shouldn't pop back up), and no liquid around the jar rim after cooling. If the lid pops up when pressed or liquid seeps out, the seal failed—refrigerate and use within 1 week or reprocess. Always test one jar before storing the batch.
What’s the safest way to reheat canned baked beans?
Transfer beans to a saucepan and heat on medium-low heat until bubbling, then simmer for 5-10 minutes to restore texture. Never microwave directly from the jar—it creates hot spots that can spoil the beans faster. For best results, add 1 tbsp water or broth per pint to prevent drying out. Reheated beans keep 3-4 days in the fridge.
Can I substitute maple syrup for molasses in this recipe?
Yes, but reduce it to ¼ cup and add 1 tsp vanilla extract to compensate for molasses' deeper flavor. Maple syrup lacks the complex, almost bitter-sweet notes of molasses, so the overall taste will be milder. For a closer match, mix ¼ cup maple syrup with ¼ cup brown sugar to replicate molasses' caramelized depth.