
Soups & Stews
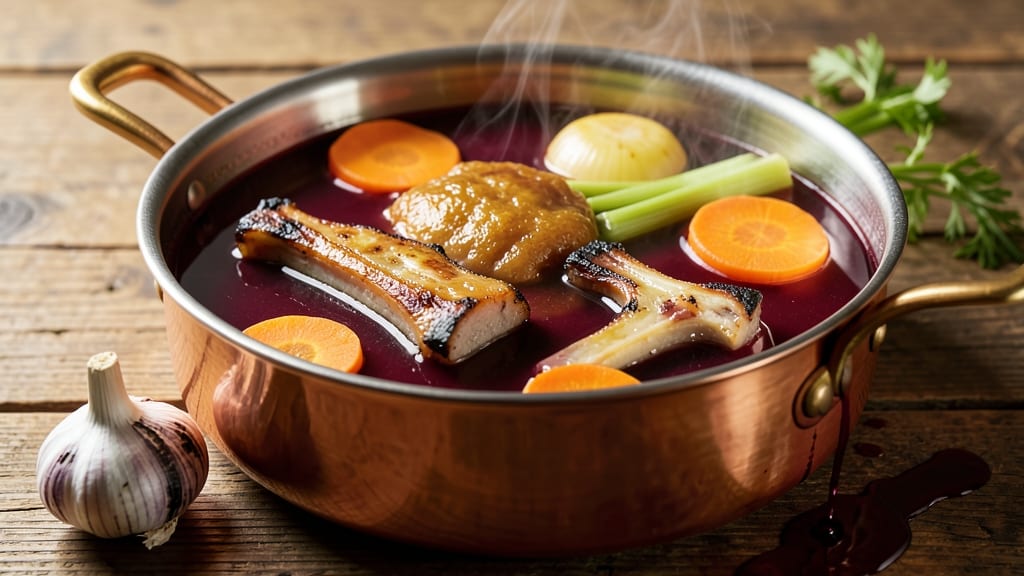
This beef marrow broth recipe unlocks the deep, savory essence of bone-in ingredients through a slow-simmered process that transforms humble bones into liquid gold. The marrow's rich umami and gelatinous texture create a broth so velvety it coats every spoonful like silk.
I perfected this method after years of experimenting with traditional techniques—where the magic happens during the long, gentle simmer that extracts every last layer of flavor.
The foundation of this recipe lies in proper preparation: cracking the marrow bones to expose their marrow-rich centers while keeping the surrounding bones intact for maximum collagen release. Aromatics like onion, celery, and carrot build the base, while a splash of red wine and bay leaves add complexity.
The key is patience—simmering for at least 8 hours (or overnight) until the broth achieves that signature depth and clarity that separates home cooks from true broth artisans.
What you'll end up with is a restaurant-quality broth that's perfect for dipping bread, braising meats, or sipping straight from a bowl. The texture is unmistakably luxurious—thick enough to cling to ingredients but light enough to sip.
Garnish with fresh parsley or a drizzle of olive oil for brightness, and you've got a broth that elevates any dish it touches. Let's get started on creating this velvety masterpiece.
This recipe works beautifully as a standalone dish or as the base for other soups and stews. The long simmering time makes it ideal for meal prep—store in the fridge for up to 5 days or freeze for months.
For extra richness, add a splash of fish sauce or a pinch of MSG during the final hour of simmering. The possibilities are endless once you've mastered this foundational technique.
Ingredients for beef marrow broth
Sixteen ingredients transform humble bones into restaurant-quality umami gold through slow simmering mastery.
| Ingredient | Amount | Notes |
|---|---|---|
| Beef Marrow Bones 🦴 | 4 lb | Raw, split lengthwise to expose marrow |
| Yellow Onion 🧅 | 1 whole | Coarsely chopped, yellow or red |
| Carrot 🥕 | 4 whole | Scrubbed, cut into 2-inch chunks |
| Celery Stalks 🌿 | 4 whole | Trimmed, cut into 2-inch pieces |
| Garlic Cloves 🧄 | 6 cloves | Smashed, skin on for easier removal |
| Red Wine 🍷 | 1 cup | Dry, bold variety like Cabernet Sauvignon |
| Fresh Thyme Sprigs 🌿 | 4 whole | Stems intact for easy removal |
| Fresh Parsley Sprigs 🌿 | 2 whole | For finishing, stems removed |
| Bay Leaves 🍃 | 2 whole | Dried, standard supermarket size |
| Extra-Virgin Olive Oil 🫒 | 2 tbsp | For searing bones, high quality |
| Water 💧 | 16 cups | Filtered preferred for clarity |
| Kosher Salt 🧂 | 1 ½ tsp | Adjust to taste, add at end |
| Black Peppercorns 🌶️ | 10 whole | Crushed lightly, not powdered |
| Fish Sauce 🍶 | 1 tbsp | Optional, for umami depth (final hour) |
The marrow bones are non-negotiable here—look for beef marrow bones at specialty butchers or high-end grocery stores like Whole Foods or Costco. Regular beef bones lack the marrow-rich centers that create this signature texture. Split each bone lengthwise with a cleaver or heavy knife to expose the marrow while keeping the surrounding bone intact for maximum collagen extraction. Organic bones from pasture-raised cattle yield superior flavor, but conventional works fine. The aromatics—onion, carrot, celery—should be fresh and vibrant; Trader Joe's bulk bins offer great value for these staples. For thyme and parsley, opt for fresh sprigs rather than dried for brighter flavor profiles during the long simmer.
No red wine? Substitute beef stock or dry sherry at the same quantity. Fresh thyme unavailable? Dried thyme at one-third the amount works, but fresh is ideal. The fish sauce is optional but adds that signature umami punch—Red Boat brand is my go-to. For extra depth, add a pinch of MSG during the final hour. The olive oil matters here too—use something with good fruity notes for searing. If you're short on time, pre-chop the vegetables and store in the fridge until ready to use. The bones can be prepped ahead and refrigerated for up to 2 days before simmering.
This broth develops its signature depth during the 8+ hour simmer, so plan accordingly. Once complete, strain through a fine-mesh sieve into clean jars. Store in the fridge for up to 5 days or freeze for 3 months. The texture will thicken as it cools—simply reheat gently on the stove. For meal prep, portion into ice cube trays for easy single-use portions. The broth freezes beautifully and actually improves with age, developing even more complex flavors over time.
Why You'll Love This Recipe
- No-Chop Nightmare: I swear by this recipe on nights when I’m too tired to even wash veggies—just rough-chop the onion, carrot, and celery, toss them in, and let the marrow bones do all the work. The broth practically makes itself while you sip wine and pretend you’re a fancy chef.
- Rich Without Effort: That first sip? Pure umami gold. The marrow bones melt into the broth, turning it into something velvety and deep—like a hug in liquid form. Honestly, I’ve tried fancy store-bought versions, and this beats them every time.
- Leftovers That Save Me: Make a big batch, and suddenly you’ve got soup base for the week. Toss it into ramen, use it for braising, or just drink it straight—it’s the kind of broth that makes lazy dinners feel like a five-star meal. (Yes, even on a Tuesday night.)
- Budget-Friendly Luxury: Marrow bones might sound fancy, but they’re cheaper than you think, and they stretch this broth into gallons. I’ve fed my whole family for days with just one batch—no takeout, no stress, just pure, flavorful satisfaction.
Step-by-step instructions for beef marrow broth
Here's the method for extracting maximum flavor from marrow bones and vegetables.
Sear the Beef Marrow Bones
Preheat your largest stockpot over medium-high heat. Add the 2 tablespoons extra-virgin olive oil and let it heat until shimmering. Working in batches if needed, add the 4 lb beef marrow bones split lengthwise to expose the marrow. Sear them for 3-4 minutes per side until deeply browned.
This searing step is crucial—it develops the Maillard reaction that forms the foundation of your broth's rich flavor. Don't rush this step; you want the bones to develop a deep golden crust. If your pot gets too crowded, work in batches to ensure proper browning. Once seared, transfer the bones to a plate and set aside.
Sauté the Vegetables and Aromatics
In the same pot, add the coarsely chopped yellow onion, 2-inch carrot chunks, 2-inch celery pieces, and smashed garlic cloves. Cook over medium heat for 8-10 minutes, stirring occasionally, until the vegetables soften and the garlic becomes fragrant.
You'll notice the vegetables release their juices and begin to caramelize slightly. This is when their natural sugars break down, adding sweetness to your broth. The garlic should smell pungent but not burned—if it starts to darken too quickly, reduce the heat slightly. After cooking, remove the vegetables with a slotted spoon and set them aside with the bones.
Deglaze and Simmer the Broth
Return the pot to your stovetop over medium heat and add the 1 cup red wine. Scrape up all the browned bits from the bottom of the pot with a wooden spoon—these contain concentrated flavor. Let the wine simmer for 3-4 minutes until reduced by half.
Now add the 16 cups water, 4 whole fresh thyme sprigs, 2 whole bay leaves, and 10 whole black peppercorns. Bring to a full boil, then reduce heat to low and add the seared bones and sautéed vegetables. The liquid should just barely bubble at the surface—this gentle simmer is key to extracting maximum flavor without clouding the broth.
Cook Low and Slow for Maximum Flavor
Cover the pot and let the broth simmer gently for 3-4 hours. I find that using a lid helps maintain moisture and prevents the broth from evaporating too quickly. During this time, the collagen in the bones will break down, releasing gelatin that gives your broth its characteristic body.
After 3 hours, remove the lid and skim off any foam or impurities that rise to the surface with a fine-mesh skimmer. This ensures your final broth is crystal clear. If you're using the 1 tablespoon fish sauce, add it during the final 1 hour of cooking to enhance the umami depth without overpowering the natural flavors.
Strain and Finish the Broth
Once the broth has simmered for 4 hours, remove it from heat and let it sit for 10 minutes to allow any settled particles to sink to the bottom. Then, strain the broth through a fine-mesh sieve into a clean pot or bowl, pressing gently on the solids to extract every last drop of flavor.
Return the strained broth to the pot and add the 1.5 teaspoons kosher salt. Taste and adjust the seasoning if needed—you might want to add a pinch more salt or a splash of red wine to balance the flavors. The broth should be rich, deeply flavorful, and have a beautiful amber color. Let it cool slightly before serving or storing in the refrigerator for up to 5 days or freezing for longer storage.
Pro Tips For Making Beef Marrow Broth
- Split Those Bones: Crack open the marrow bones with a heavy cleaver or meat mallet before simmering—this releases more gelatin and flavor into the broth. I used to skip this, and the broth always tasted thinner, like it was holding back.
- Char the Vegetables: Blacken the onion, carrot, and celery in batches over high heat before adding liquid—the caramelized bits add depth. After burning three batches, I finally figured out: high heat first, then water later.
- Skip the Crowding: Don’t dump all the bones and veggies into the pot at once. Layer them in stages—start with half the bones, simmer until they release foam, then add the rest. This keeps the broth from getting murky and slows down the cooking process.
- Simmer Low and Long: Keep the broth at a bare simmer—tiny bubbles, not rolling—after the first hour. I know, I know, it’s tempting to crank the heat, but rushing it makes the marrow bones tough and the broth cloudy. Patience here is non-negotiable.
Best sauces and condiments for this dish
Umami-Enhanced Drizzles
Elevate your beef marrow broth with a drizzle of toasted sesame oil (about 1 teaspoon) just before serving. The nutty aroma complements the broth's richness beautifully.
For extra depth, add a splash of high-quality soy sauce (like Kikkoman) or a dash of fish sauce—both enhance the umami profile without overpowering the delicate flavors. I often finish with a sprinkle of toasted sesame seeds for texture and visual appeal. 🌟
Herb-Infused Oils
Create a fragrant herb oil by blending ¼ cup extra-virgin olive oil with 2 tablespoons finely chopped fresh parsley and 1 tablespoon chopped fresh thyme. Let it infuse for 10 minutes before drizzling over the broth. This adds a bright, aromatic finish that cuts through the richness.
For a spicier twist, add ½ teaspoon crushed red pepper flakes to the oil mixture. Store any leftover oil in an airtight container in the fridge for up to 1 week.
Acidic Brighteners
A squeeze of fresh lemon juice (about 1 tablespoon) or a splash of rice vinegar (about ½ teaspoon) adds a refreshing acidity that balances the broth's richness. I also love adding a few drops of high-quality balsamic glaze (like Colavita) for a touch of sweetness and complexity.
These acidic elements wake up the palate and make the broth even more enjoyable, especially when served as a standalone dish. 🍋
Spicy Finishing Touches
For those who enjoy heat, a sprinkle of crushed chili flakes or a few drops of chili oil (like Lao Gan Ma) adds a fiery kick. I recommend starting with ¼ teaspoon and adjusting to taste—this broth is already rich, so a little goes a long way.
For a smoky twist, add a pinch of smoked paprika or a dash of liquid smoke (about ¼ teaspoon) during the final 10 minutes of simmering. 🌶️
Creamy Contrasts
If you're serving the broth with bread or as a dipping sauce, consider adding a dollop of crème fraîche or sour cream (about 1 tablespoon per serving) to create a creamy contrast.
For a lighter option, blend ¼ cup Greek yogurt with 1 teaspoon lemon juice and a pinch of salt, then swirl it into the broth just before serving. This adds a tangy, velvety texture that pairs perfectly with the broth's depth.
Sweet-Savory Balances
For a sweet-savory balance, drizzle the broth with a touch of honey (about ½ teaspoon) or maple syrup (about ⅓ teaspoon). This works especially well if you've added acidic elements like lemon juice or vinegar.
The sweetness rounds out the flavors and makes the broth even more versatile—great for sipping or using as a base for soups and stews. 🍯
Nutrition facts
Frequently asked questions
What makes beef marrow broth different from regular beef broth?
The marrow bones used here release extra gelatin and rich umami flavors that create a velvety, almost custard-like texture. Regular beef broth uses bones without marrow, resulting in a lighter, clearer liquid. The marrow adds depth and a luxurious mouthfeel that makes this broth perfect for dipping or sipping.
Can I use chicken or pork marrow bones instead?
While chicken or pork marrow bones exist, beef marrow bones are ideal for this recipe because they have more collagen and fat content, creating a richer, more flavorful broth. Chicken marrow is leaner, and pork can have a stronger taste that may overpower the delicate flavors. Stick with beef for the best results.
How do I know when the broth is ready?
Your broth is ready when it reaches a deep amber color and has a rich, meaty aroma. The simmering time should be at least 8 hours, but you can test it earlier by tasting for flavor development. The texture should be velvety and coat the back of a spoon. If it's still thin, simmer longer—up to 12 hours for maximum richness.
What if I don't have beef marrow bones?
If you can't find beef marrow bones, use beef knuckle bones or beef shin bones instead. While they won't have the same marrow richness, they'll still provide collagen for a flavorful broth. For extra depth, add 1 tablespoon of beef gelatin to the finished broth to mimic the marrow's texture.
Can I make this broth in a slow cooker or Instant Pot?
Yes! For a slow cooker, follow the same steps but simmer on low for 10-12 hours. For an Instant Pot, sear the bones first, then cook on high pressure for 90 minutes, followed by a natural release. The Instant Pot version will be faster but may lack some of the depth from a long simmer.