
Side Dishes
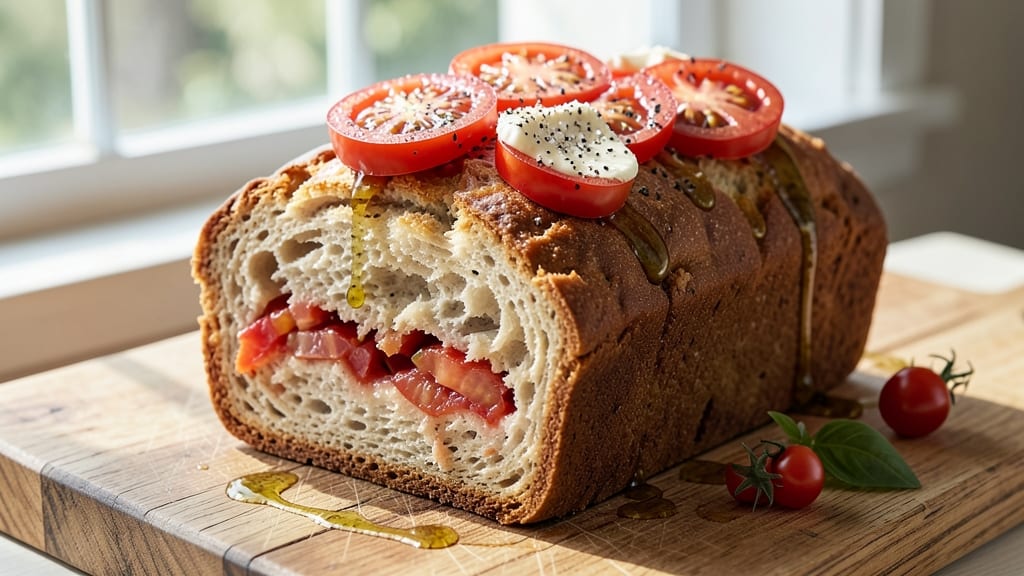
This Amish tomato bread recipe brings the heart of Pennsylvania farm kitchens to your table with its perfect balance of sweet, savory, and hidden vegetable goodness. 🌟 The secret lies in blending ripe tomatoes with traditional bread dough, creating a loaf that's both comforting and subtly nutritious—a staple in Amish households for generations.
What makes this recipe special is how it transforms simple ingredients into something extraordinary without requiring advanced baking skills.
The beauty of Amish tomato bread is in its simplicity and versatility. Using basic pantry staples like flour, sugar, and yeast, this recipe delivers a tender, slightly dense loaf with a golden crust that's perfect for slicing thick.
The tomatoes add natural sweetness while keeping the bread moist for days, making it ideal for breakfast toast or a hearty side with soups and stews. Baking time is just under an hour, and the dough requires minimal handling.
What you'll achieve is a loaf that's sweet enough to spread with butter but savory enough to pair with jam or cheese. The texture is perfectly balanced—soft enough to cut easily but firm enough to hold its shape.
This bread has a way of making everyday meals feel special, whether you're serving it warm from the oven or enjoying it the next day with a cup of coffee.
The best part? This recipe honors traditional Amish baking methods while adapting to modern kitchens. No special equipment is needed beyond what you already have, and the ingredients are easy to find.
Once you try this bread, you'll understand why it's been a beloved staple in Pennsylvania Dutch communities for so long. Let's get baking!
Ingredients for amish tomato bread
Pantry staples meet garden-fresh tomatoes for this iconic Amish bread—simple but magical.
| Ingredient | Amount | Notes |
|---|---|---|
| All-Purpose Flour 🌾 | 4 cups | White or whole wheat blend |
| Granulated Sugar 🍚 | ¼ cup | White or light brown |
| Active Dry Yeast 🍞 | 2 ¼ tsp | One packet preferred |
| Warm Water 💧 | 1 cup | 110°F for yeast activation |
| Ripe Tomatoes 🍅 | 1 ½ cups | Fresh, peeled and chopped |
| Unsalted Butter 🧈 | ½ cup | Softened, full-fat preferred |
| Large Eggs 🥚 | 1 whole | Room temperature |
| Salt 🧂 | 1 ½ tsp | Kosher or sea salt |
| Baking Powder 🍞 | 1 ½ tsp | Aluminum-free preferred |
| Milk 🥛 | ½ cup | Whole milk for richness |
| Ground Cinnamon 🌿 | ½ tsp | Freshly ground preferred |
| Vanilla Extract 🍯 | 1 tsp | Pure vanilla preferred |
| Cornmeal 🌽 | ¼ cup | For dusting pan |
The tomatoes are the heart of this bread, so pick perfectly ripe ones—they should be soft to the touch but not mushy. Heirloom varieties from farmers markets add extra flavor, but regular grocery store tomatoes work too. For a deeper tomato taste, roast them first (toss halved tomatoes with olive oil, bake at 400°F for 20 minutes). The yeast is your secret weapon here—check expiration dates and use it fresh. I grab mine from the baking aisle at Walmart or Kroger—they keep it stocked and it's always reliable. The butter? Full-fat makes all the difference—none of that low-fat nonsense here. And if you're using whole wheat flour, sift it first to avoid a dense loaf.
No ripe tomatoes? Canned crushed tomatoes work in a pinch—just drain them well. Short on butter? Olive oil at half the amount keeps things moist. The milk can be swapped for buttermilk or plain yogurt for extra tang. No vanilla? Vanilla sugar at double the amount gives you that warm flavor. For a sweeter loaf, add 1/4 cup raisins or dried cranberries. The baking powder is crucial—don't skip it or you'll end up with dense bread. If you're at high altitude, add 1/4 tsp more baking powder. And if you're making this ahead, prep the dough the night before—it tastes even better after resting.
This bread keeps beautifully—3-4 days at room temperature wrapped in a clean towel, or up to 5 days in an airtight container. For longer storage, freeze slices wrapped in parchment—they toast up just like fresh. I like to slice it thick and freeze portions for quick breakfasts. The tomatoes make this bread extra moist, so it doesn't dry out like regular bread. Toast it for extra flavor—that crispy crust is worth the extra minute. And if you're serving it warm, brush with melted butter right out of the oven—absolute game-changer.
Why You'll Love This Recipe
- Here’s what sold me: the sugar caramelizes just enough to balance the tomatoes’ tang, while the yeasty crust adds a chewy bite. Honestly, it’s the kind of bread where you’ll pause mid-slice to savor it—no fancy ingredients, just pure flavor.
- I’ll be real: ripe tomatoes are often cheap, and flour, sugar, and yeast don’t break the bank. A single batch feeds four, and leftovers? They toast up just as well the next day. It’s the kind of recipe that makes me feel like I’m feeding a crowd without the grocery bill to prove it.
Step-by-step instructions for Amish tomato bread
This sweet-savory loaf comes together beautifully with a few key techniques—let's get started!
👨🍳 Step 1: Activate the Yeast and Prepare the Tomato Purée
In a small bowl, whisk together the 1 cup warm water (about 110°F) with the 2.25 teaspoons active dry yeast and 0.25 cup granulated sugar. Let this sit for 5-10 minutes until it becomes frothy—this tells you the yeast is alive and ready to work its magic. If it doesn't bubble, your yeast might be dead, and you'll need to start over.
While that foams, blend the 1.5 cups ripe tomatoes in a food processor or blender until completely smooth. You want a thick purée with no chunks—this will create the bread's signature subtle tomato flavor without altering the texture. Strain through a fine-mesh sieve if needed to remove any remaining seeds.
🍳 Step 2: Mix the Wet and Dry Ingredients
In a large mixing bowl, combine the 4 cups all-purpose flour, 1.5 teaspoons salt, 1.5 teaspoons baking powder, and 0.5 teaspoon ground cinnamon. Whisk these dry ingredients together until evenly distributed—this ensures your bread rises properly and has that perfect tender crumb.
In a separate bowl, mix the yeast mixture, tomato purée, 0.5 cup softened unsalted butter, 1 whole large egg, 0.5 cup milk, and 1 teaspoon vanilla extract until smooth. Here's the thing—don't overmix this wet mixture. You're looking for just a few lumps, not a completely smooth batter. Pour this into the dry ingredients and stir gently with a wooden spoon until everything comes together into a shaggy dough.
🥘 Step 3: Knead and Let the Dough Rise
Turn the dough out onto a lightly floured surface and knead for 5-7 minutes until smooth and elastic. You'll know it's ready when it springs back slowly when poked. Here's a pro tip: if the dough feels too sticky, add just enough of the 4 cups flour to make it manageable, but don't overdo it—too much flour makes for a dense loaf.
Place the dough in a lightly greased bowl, cover with a clean kitchen towel, and let it rise in a warm place for 1-1.5 hours or until doubled in size. You're looking for that puffy, airy look—this is what gives your bread its signature light texture. If your kitchen isn't warm, pop the bowl near your oven with the light on to create a cozy environment.
🔥 Step 4: Shape and Proof the Loaf
Punch down the risen dough to release any air bubbles, then shape it into a rectangular loaf about 9x5 inches. Place it on a baking sheet dusted with 0.25 cup cornmeal—this prevents sticking and adds a nice crunch to the bottom. Cover again and let it proof for another 30-45 minutes until it's puffy and just about ready for the oven.
Preheat your oven to 375°F while the dough proofs. Here's where the magic happens: brush the top of the loaf with a bit of milk mixed with water (about 2 tablespoons milk + 1 tablespoon water) for a beautiful golden crust. Bake for 30-35 minutes until the bread is golden brown and sounds hollow when tapped on the bottom.
⏰ Step 5: Cool and Enjoy Your Creation
Remove the bread from the oven and let it cool on a wire rack for at least 15 minutes before slicing. This resting period is crucial—it allows the steam inside to escape, preventing a gummy texture. You'll notice that beautiful golden crust develop as it cools, and the aroma will make your kitchen smell like a bakery!
Slice the bread into ½-inch thick pieces and serve warm. The combination of sweet tomato purée, subtle cinnamon warmth, and that perfect tender crumb makes this loaf irresistible. Store any leftovers wrapped in a bread bag at room temperature for up to 3 days, or freeze for longer storage. Trust me, you'll want to make this again!
Pro Tips For Making Amish Tomato Bread
- Use 110°F Water: DESCRIPTION:
- Blend Tomatoes Smooth: DESCRIPTION:
- Don’t Overmix the Dough: DESCRIPTION:
- Bake Until Internal Temp Hits 190°F: DESCRIPTION:
Common mistakes when making your amish tomato bread
Overmixing the Dough
I see this all the time—overmixing the dough until it becomes smooth and elastic like pizza dough. This is a common mistake that develops gluten too much, resulting in a dense, chewy loaf instead of the tender texture we want.
The wet ingredients should be combined just until no dry spots remain, leaving a few small lumps. Once you add the dry ingredients, stir only until everything comes together into a shaggy dough.
Overmixing activates too much gluten, which is perfect for pizza but ruins this bread's delicate crumb. 🥖
Skipping the Yeast Test
Many home bakers forget to check if their yeast is active before mixing. Add the yeast to warm water with sugar and wait 5-10 minutes—it should create a foamy, bubbly mixture. If it doesn't, your yeast is dead and needs replacing.
I've ruined several batches by assuming old yeast would work. Always test it first, especially if your yeast packet is past its expiration date or came from a less-than-ideal environment. 💡
Using Underripe Tomatoes
The tomatoes are what give this bread its signature flavor, so using underripe ones is a big mistake. Unripe tomatoes will make your bread taste bland and sour, defeating the purpose of the recipe.
Choose tomatoes that are soft to the touch but not mushy—think slightly squishy like a ripe avocado. If you're unsure, roast them first to concentrate their sweetness. I've used grocery store tomatoes before, and while they work, heirloom varieties from farmers markets elevate the flavor dramatically. 🍅
Incorrect Oven Temperature
Baking at the wrong temperature is another frequent issue. 375°F is critical—any lower, and your bread will be dense; any higher, and it'll burn before fully cooking. I've seen people bake this at 350°F thinking it's safer, only to end up with a gummy interior.
Preheat your oven thoroughly and use an oven thermometer to confirm accuracy. If your oven runs hot, consider baking for 25-30 minutes instead of the full 30-35 minutes. 🌡️
Not Letting the Bread Cool
I can't tell you how many times I've sliced bread too soon after baking—only to end up with a gummy, uneven texture. Letting the bread cool for at least 15 minutes allows the steam inside to escape and the structure to set properly.
The crust will firm up during this time, and the crumb will develop its ideal texture. If you're impatient, at least wait 10 minutes, but I promise the extra wait is worth it for that perfect slice. ⏳
Ignoring the Milk Wash
The final step of brushing the loaf with milk before baking is what creates that beautiful golden crust. Skipping this step results in a dull, pale loaf that lacks that bakery-fresh appeal. Mix 2 tablespoons milk with 1 tablespoon water and brush it on just before baking.
This creates a thin, edible crust that's both attractive and delicious. I've made this mistake and regretted it every time—the difference is night and day. 🍞
Nutrition facts
Frequently asked questions
Why does Amish tomato bread have tomatoes in it?
The tomatoes create a perfect balance of sweet and savory flavors while adding natural moisture that keeps the bread fresh longer. This traditional technique dates back to Pennsylvania Dutch farming communities, where garden-fresh tomatoes were abundant and used creatively in simple recipes. The purée also gives the bread its signature tender crumb without altering the classic bread texture.
Can I make this bread without yeast?
Yes, but the texture will be different. For a quick version, use 1.5 teaspoons baking powder instead of yeast and reduce the rise time to 15 minutes before baking. The bread will be denser and less fluffy, but still delicious. Traditional Amish recipes often use yeast for that signature lightness, though.
How do I store leftovers to keep them fresh?
Wrap the bread in a clean kitchen towel or place in an airtight container at room temperature for 3-4 days. For longer storage, slice and freeze portions on parchment paper—this prevents freezer burn and makes quick toasts. The tomato flavor actually intensifies slightly when stored properly, making it even more flavorful the next day.
What's the best way to reheat slices?
For crispy toast, use a toaster or skillet over medium heat for 1-2 minutes per side. To warm without browning, wrap slices in a damp paper towel and microwave for 10-15 seconds. The milk wash creates a perfect crust that reheats beautifully—just avoid overdoing it or the bread may become gummy.
Can I substitute canned tomatoes?
Use 1 (14.5 oz) can crushed tomatoes, drained well, in place of fresh. For best results, simmer the canned tomatoes with 1 teaspoon sugar for 5 minutes to concentrate the flavor before using. The texture will be slightly different but still delicious—just don't expect the same fresh garden taste as ripe summer tomatoes.